DISCLAIMER
I am not an engineer or an electronics expert. I’m just a guy that likes to tinker in his garage and I’m learning all of this as I go. I’m also obsessed with this sport and I want to see it grow and flourish. I didn’t even know how to solder before I began this project. If you decide to reference my build, please also do your own research. Watch/read the excellent build guides put out by Surfdado, Mario Contino, and others. Also, read the f’ing manual.
Mario’s 20s FOCer Build Log
Surfdado’s vesc conversion tutorial videos
INFORMATION
This is a work in progress and it will be updated as things change, but I wanted to share my build diagram because I think it may be useful to others. I plan to eventually finalize this post with a completed diagram and build photos. If you have any questions or suggestions, please share!
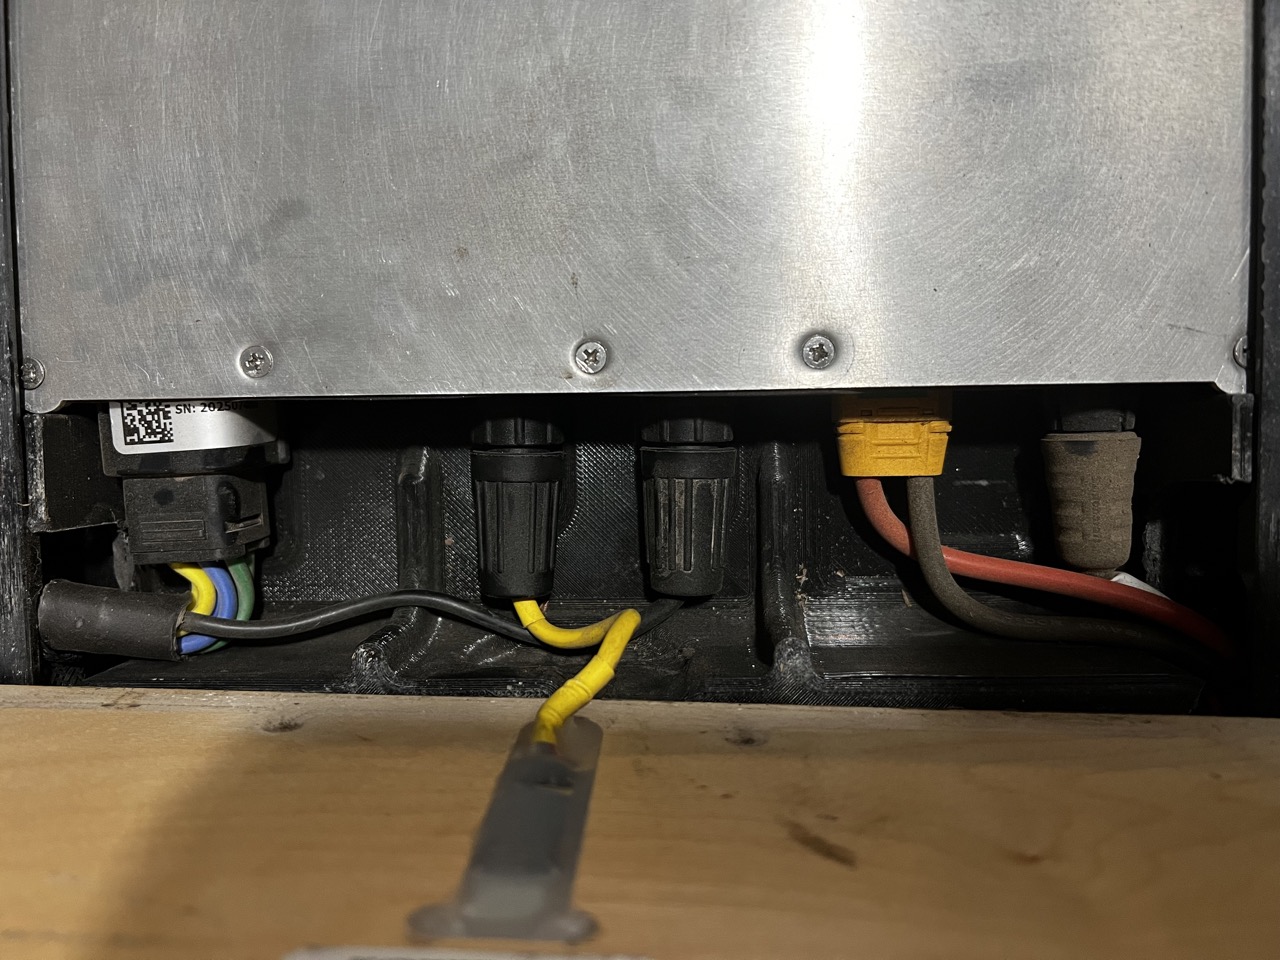
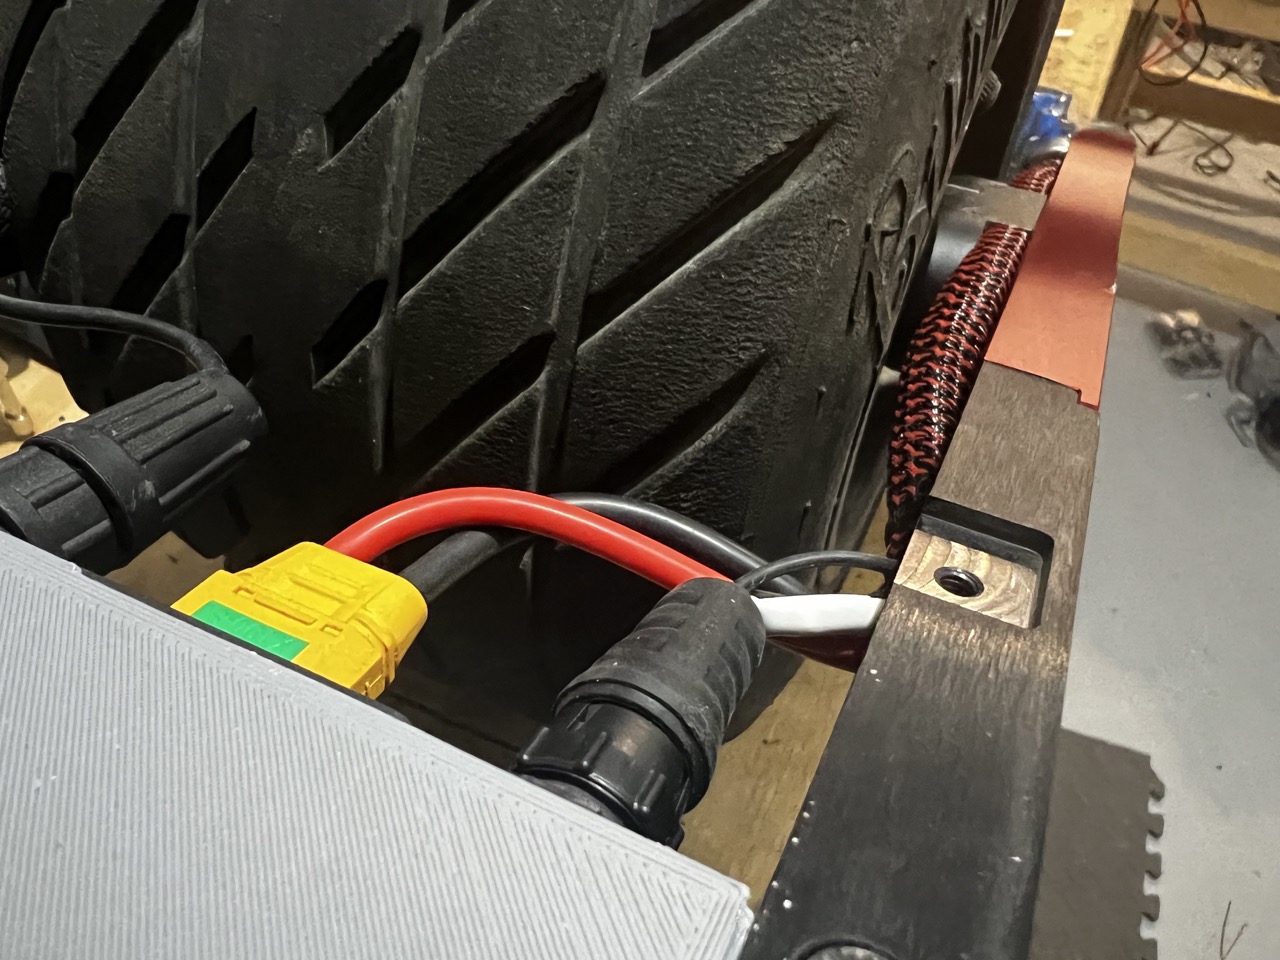
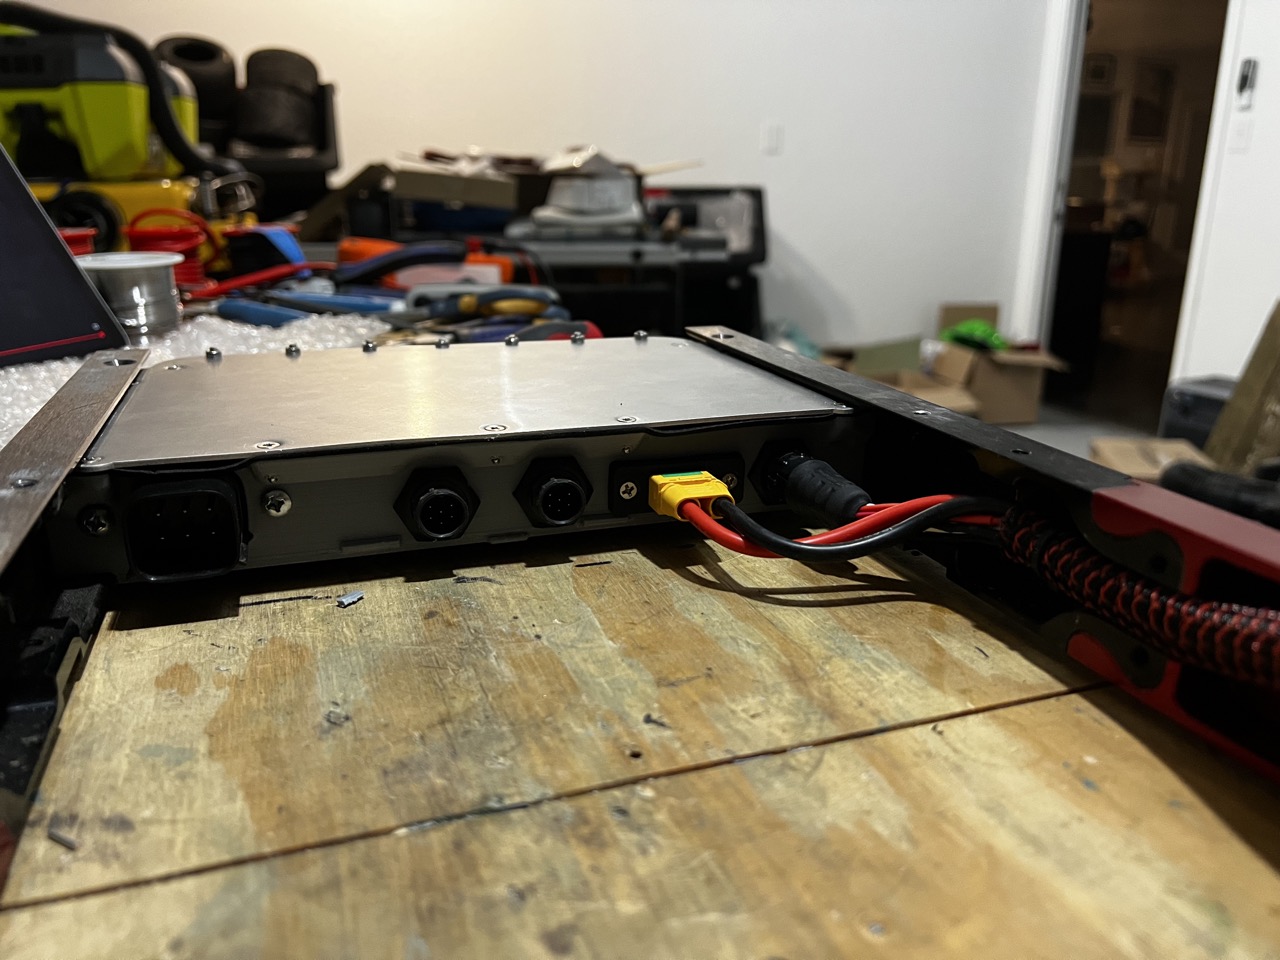
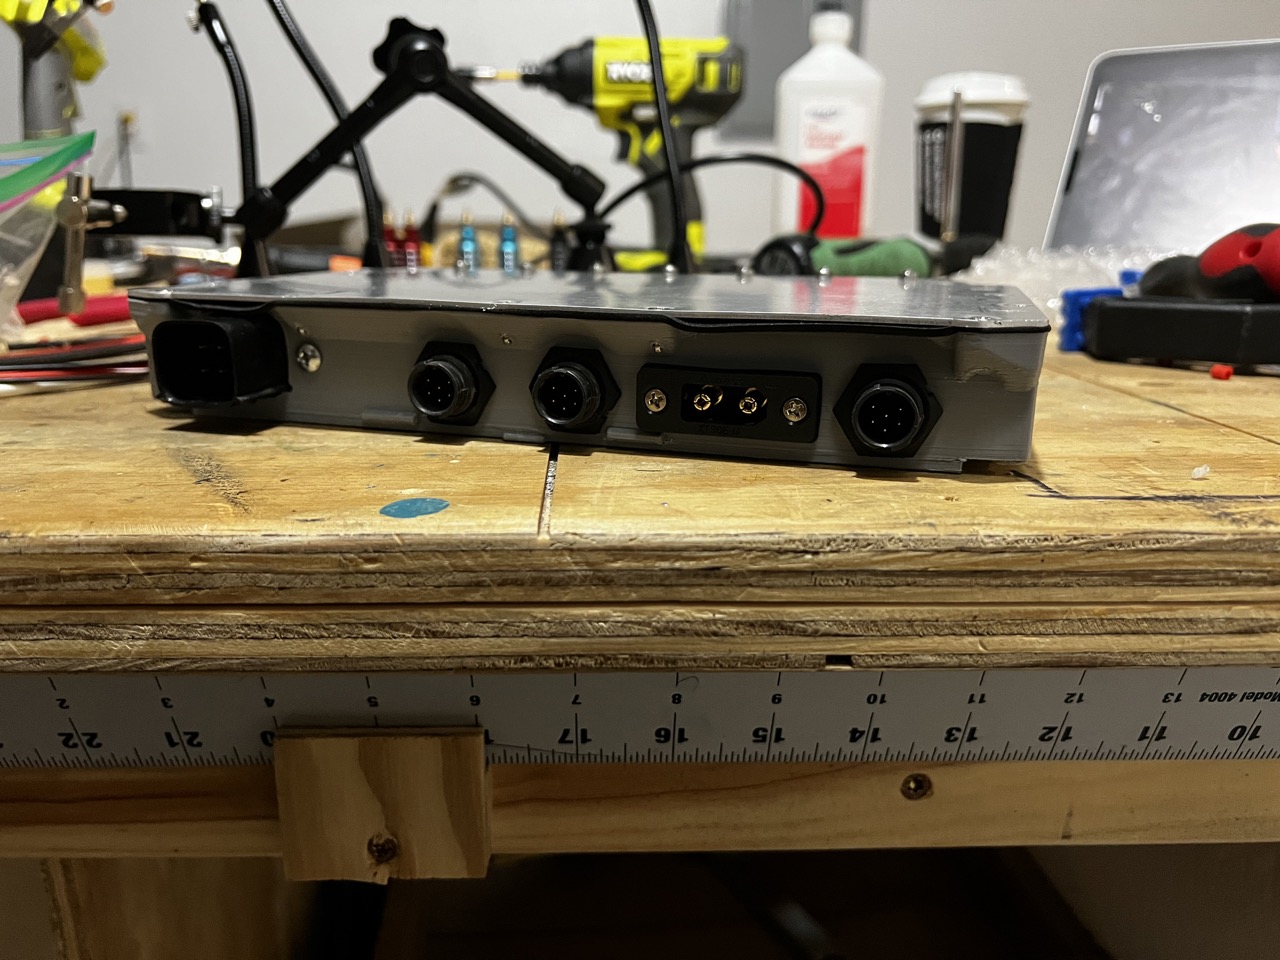
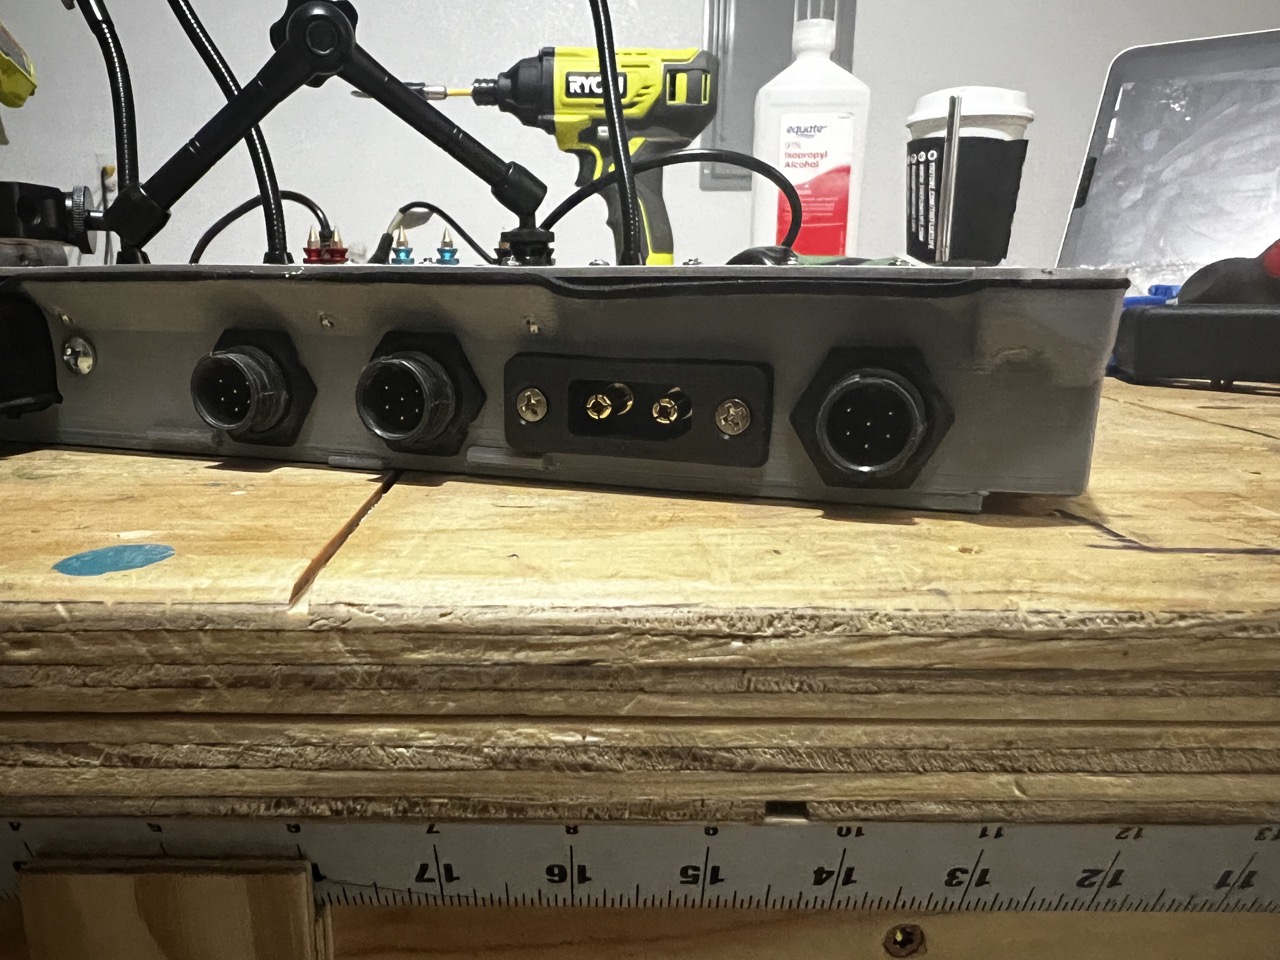
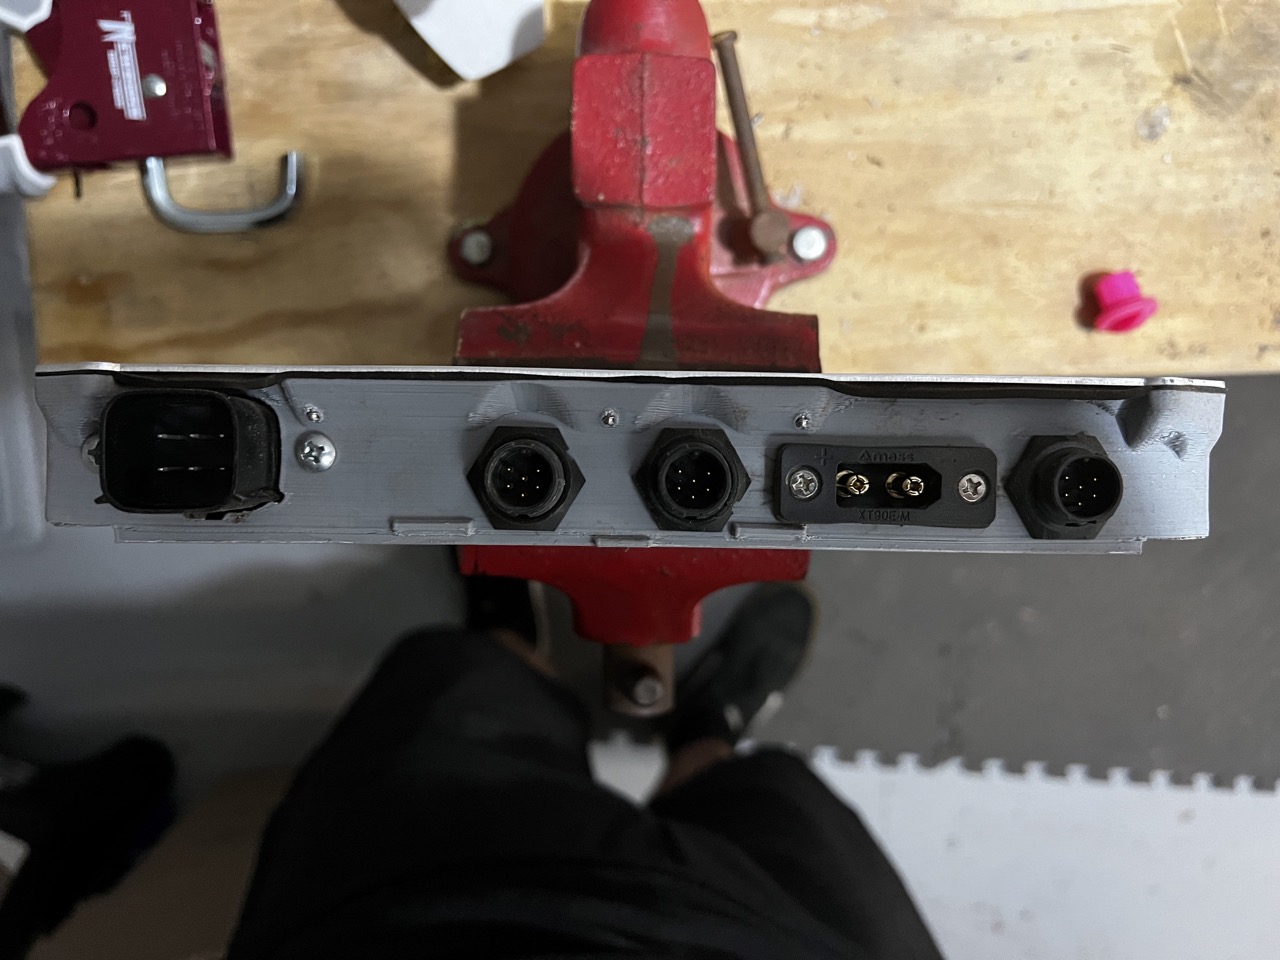
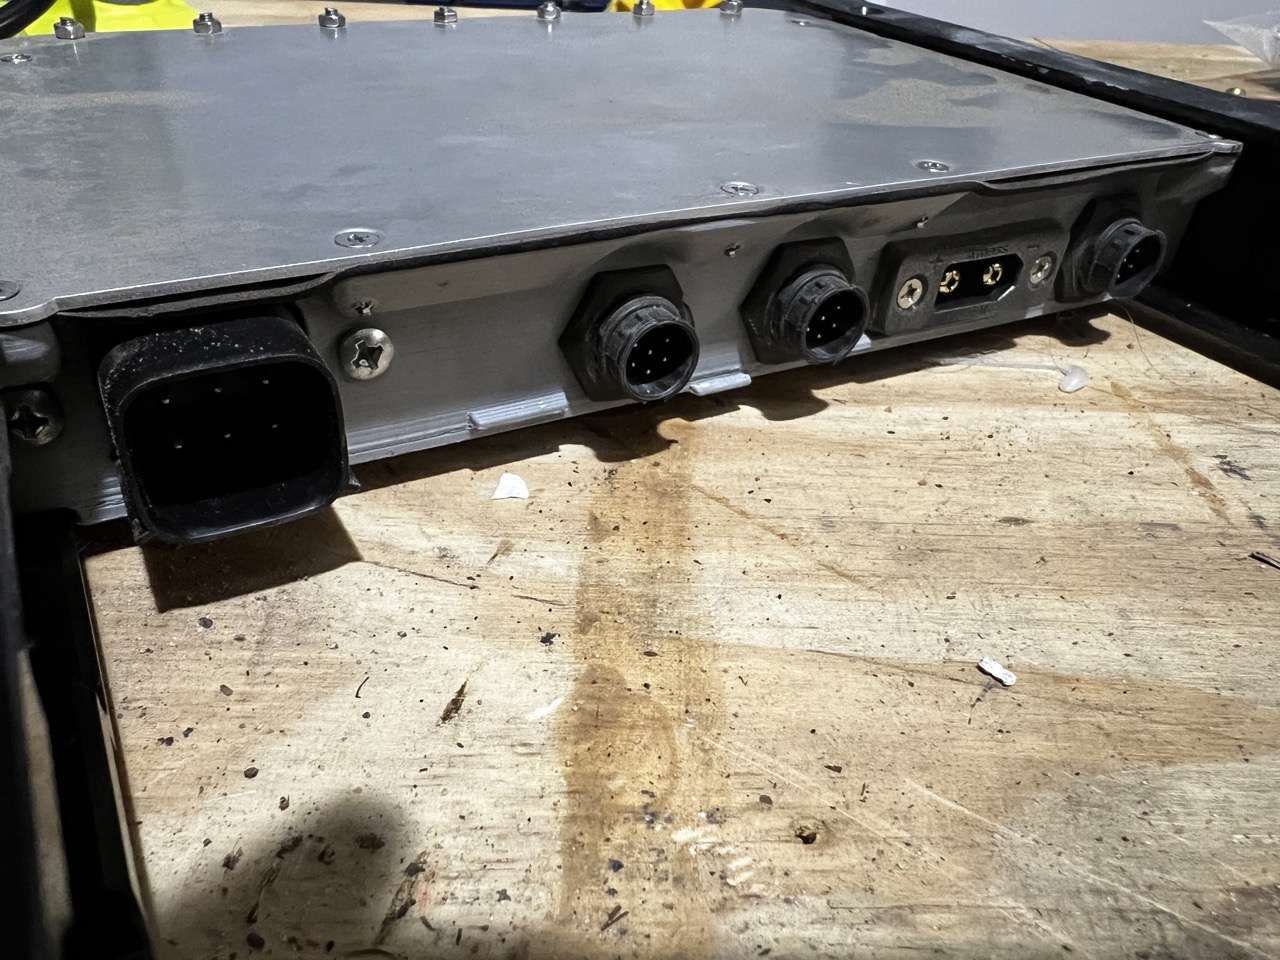
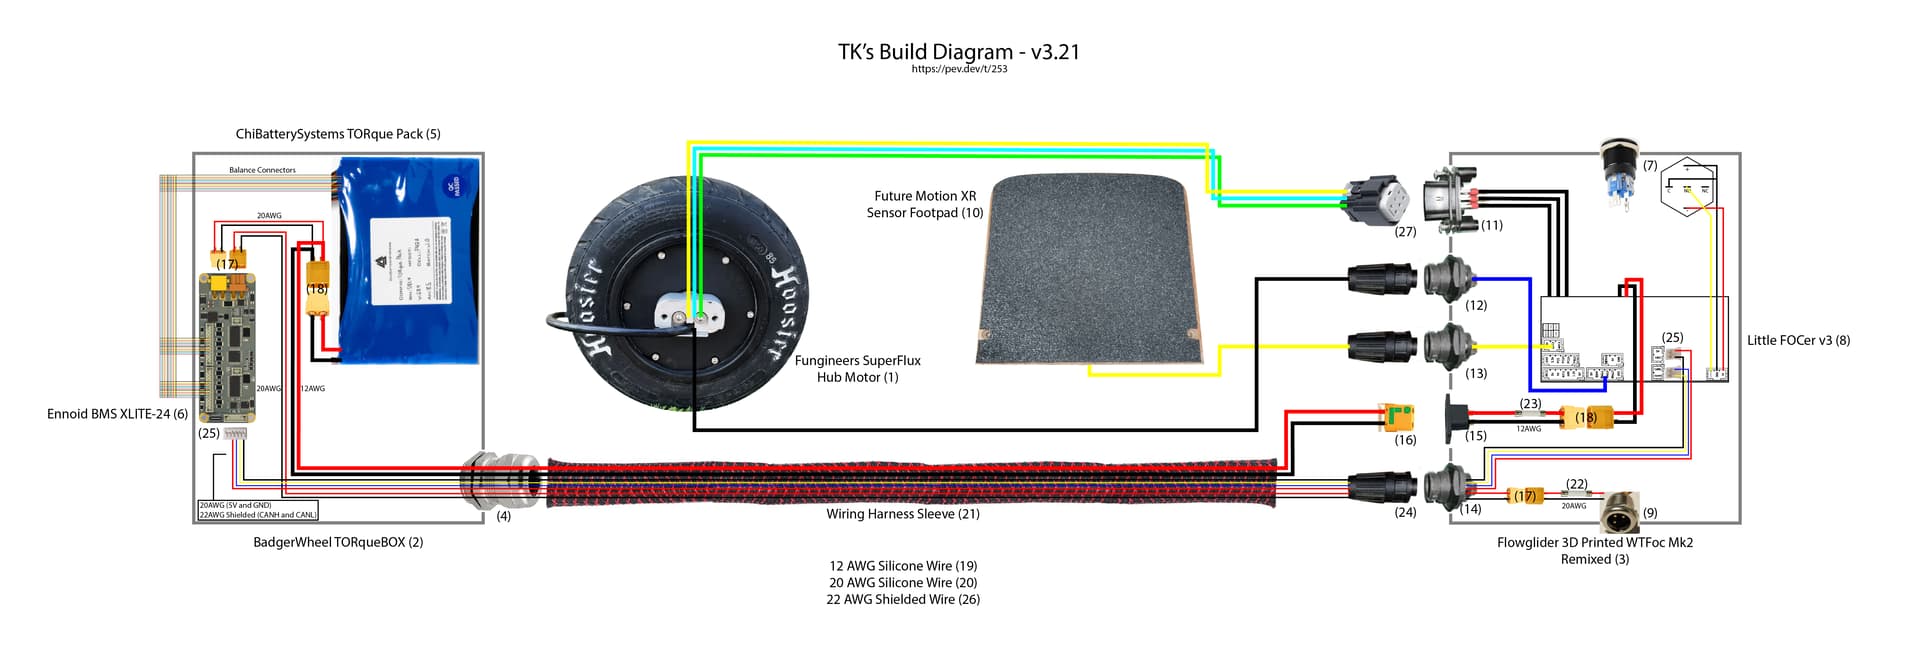
For this build, I am using one XT90 and one Switchcraft 6 pin connector instead of the 16 pin Molex for the wiring harness. I’m using a customized version of Flowglider’s little focer V3 WTFoc MK2 controller enclosure, which I’ve uploaded to Thingiverse here:
Remixed little focer V3 WTFoc MK2 (XT90 and Switchcraft) by robocat_studios - Thingiverse
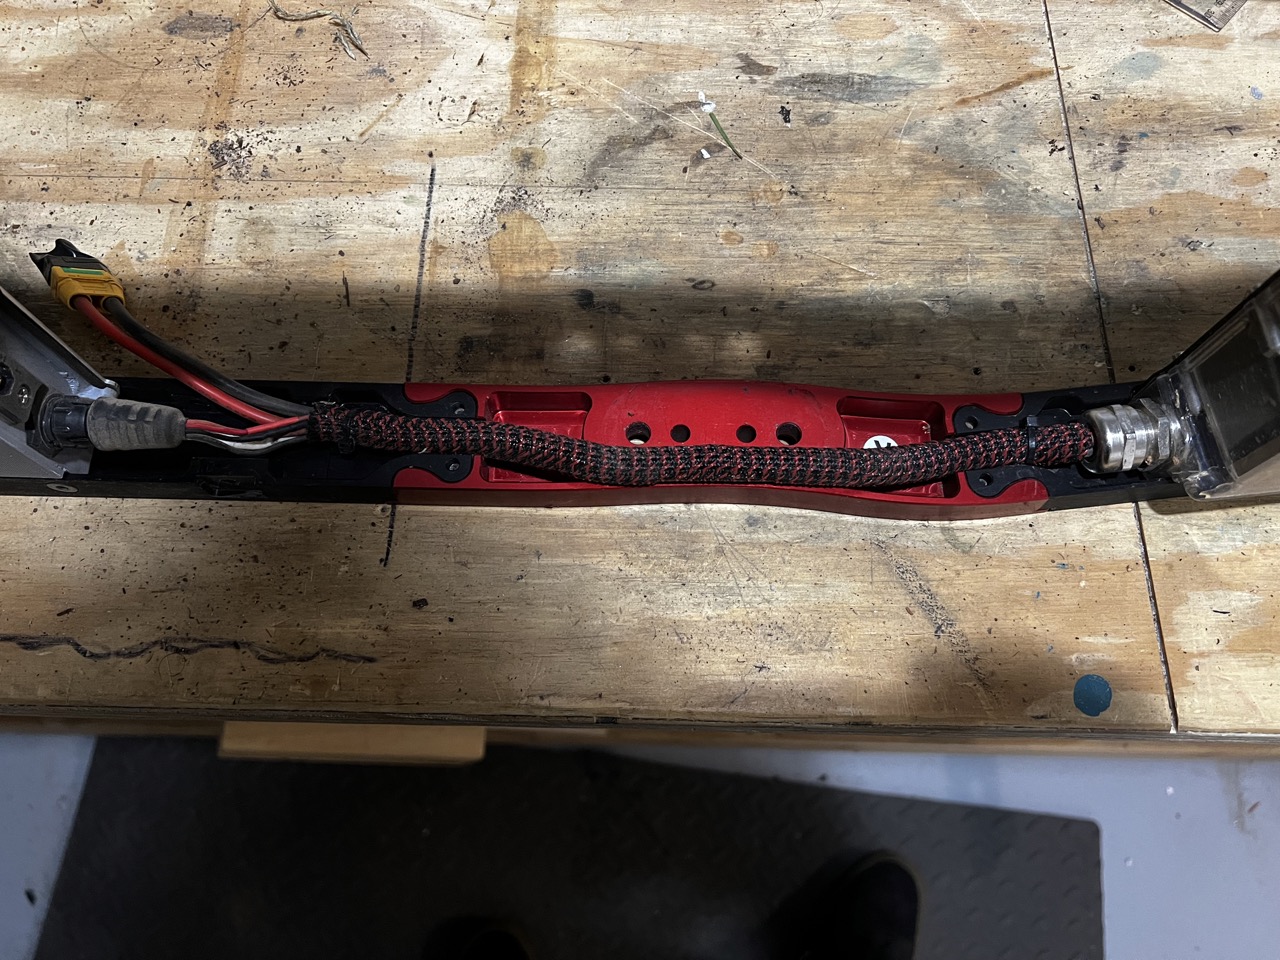
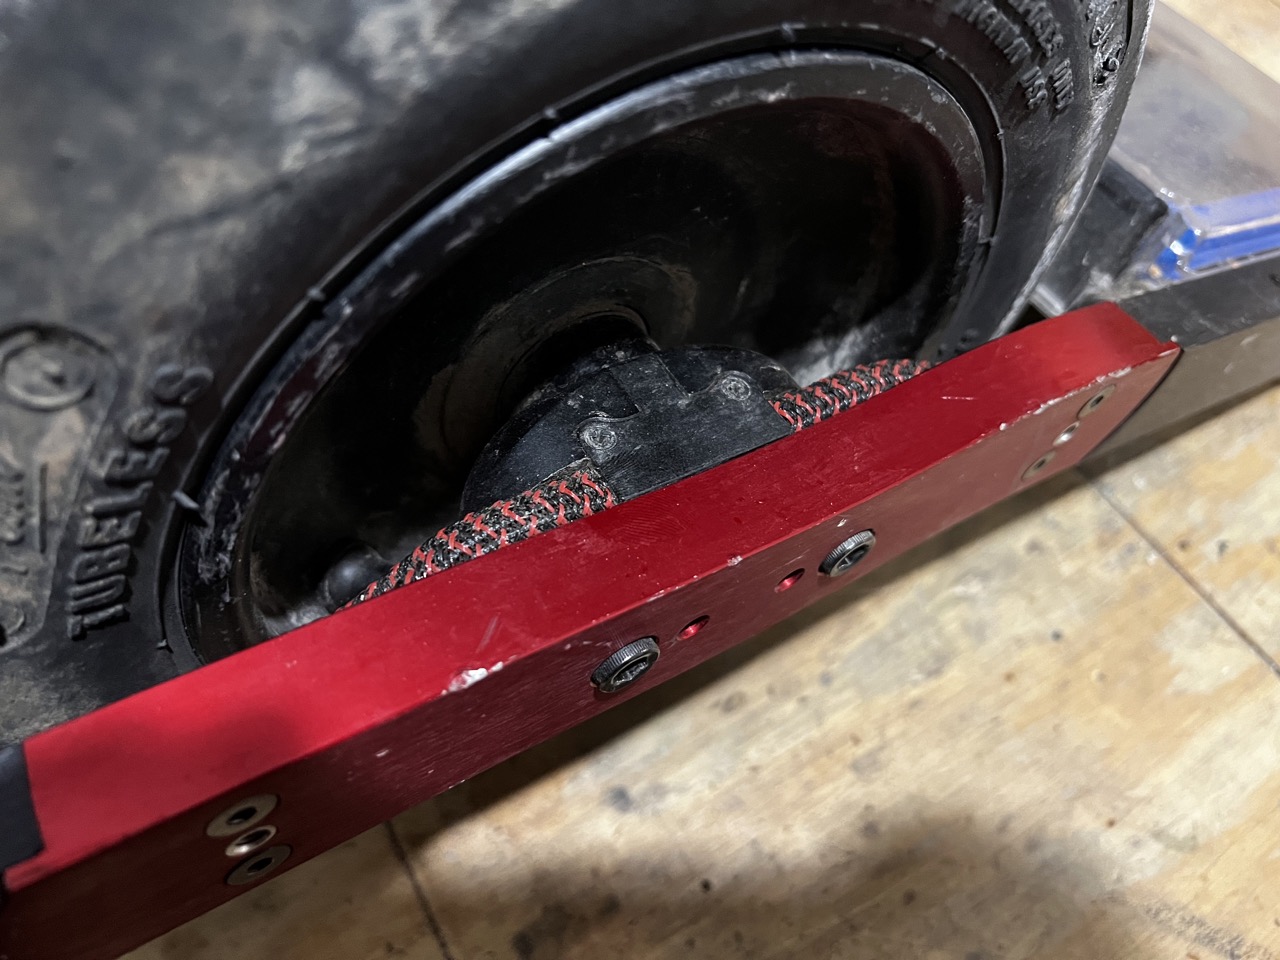
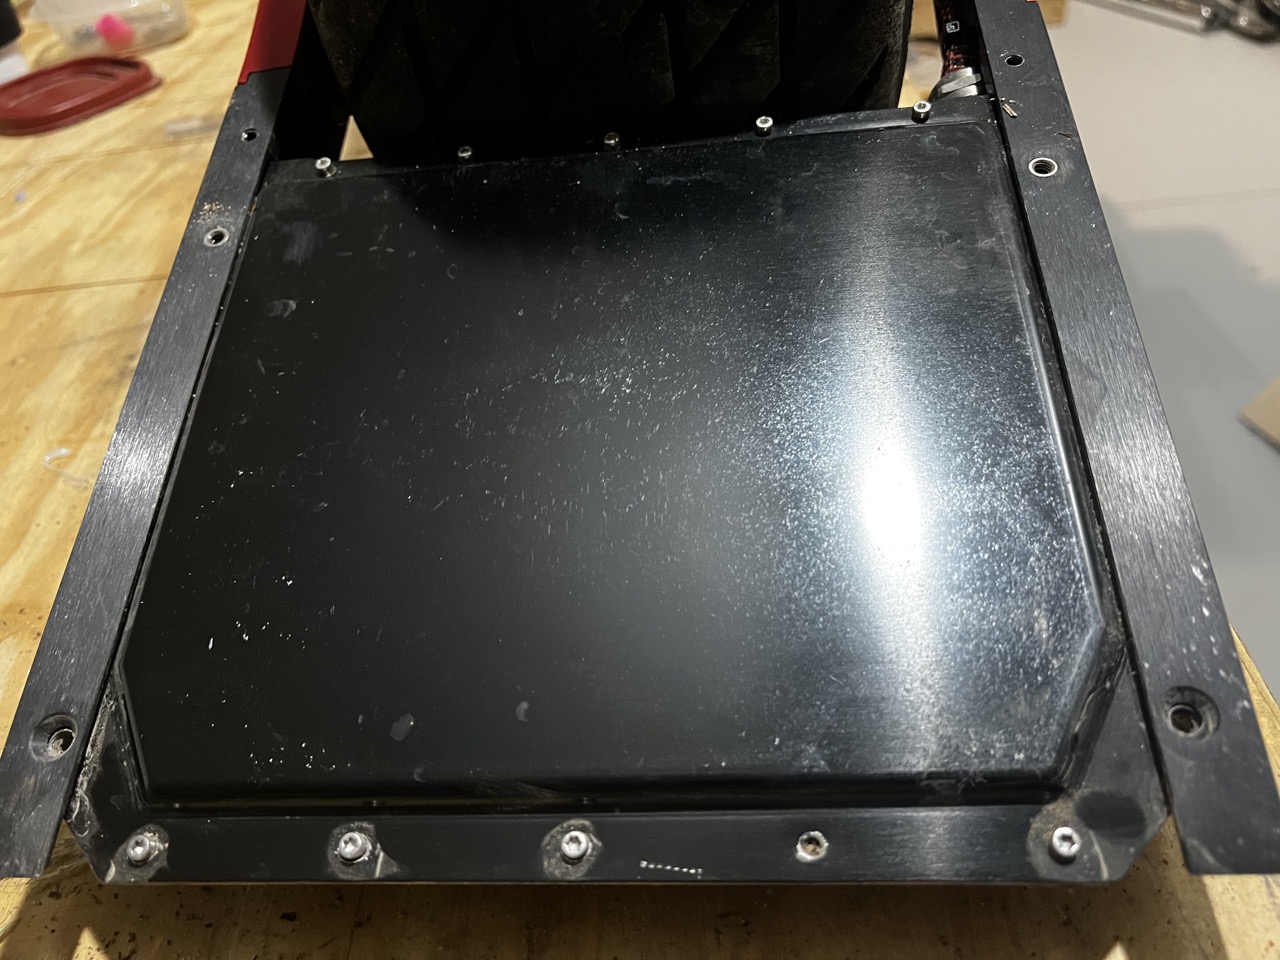
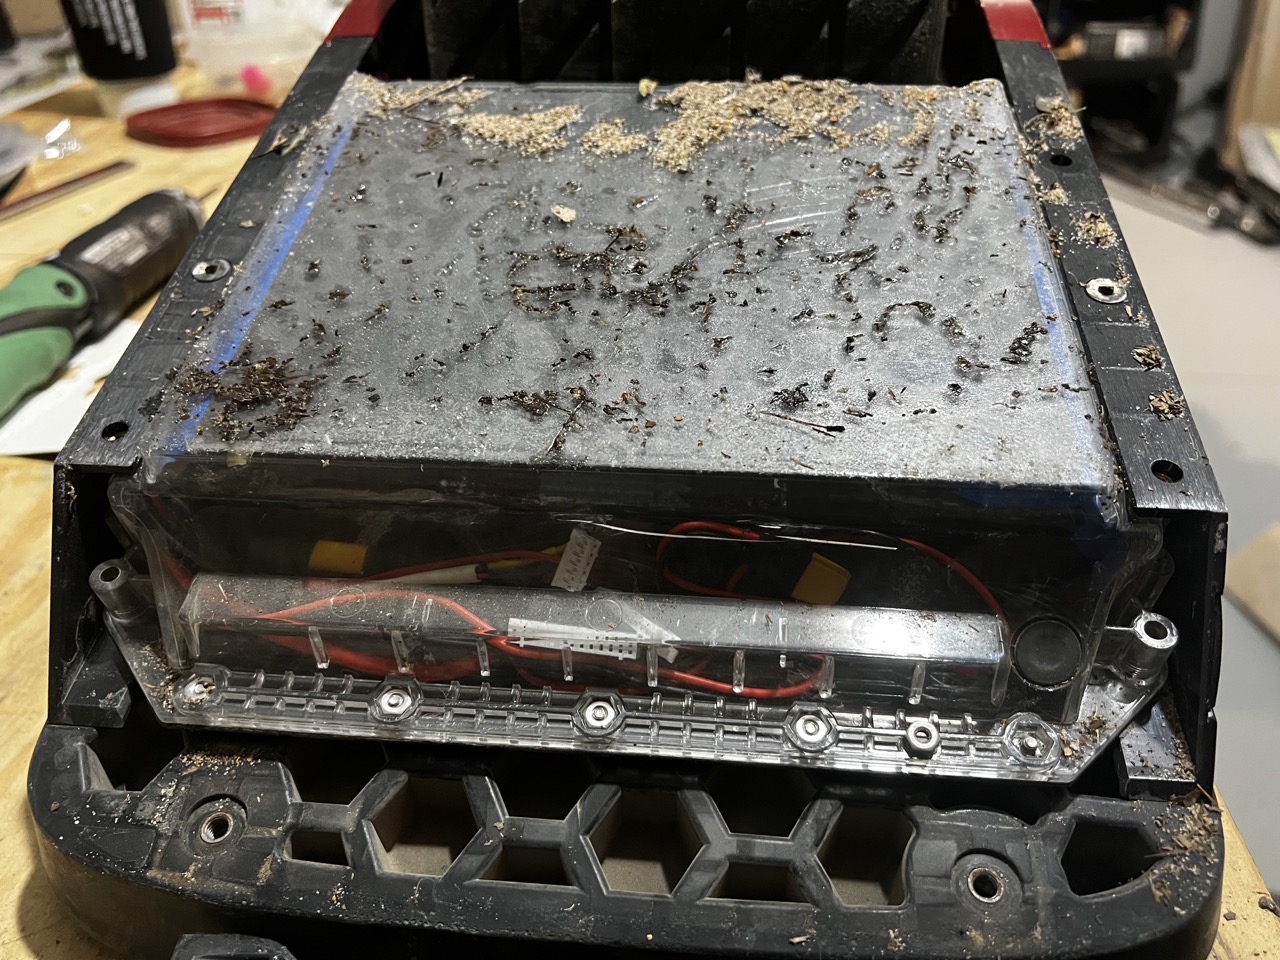
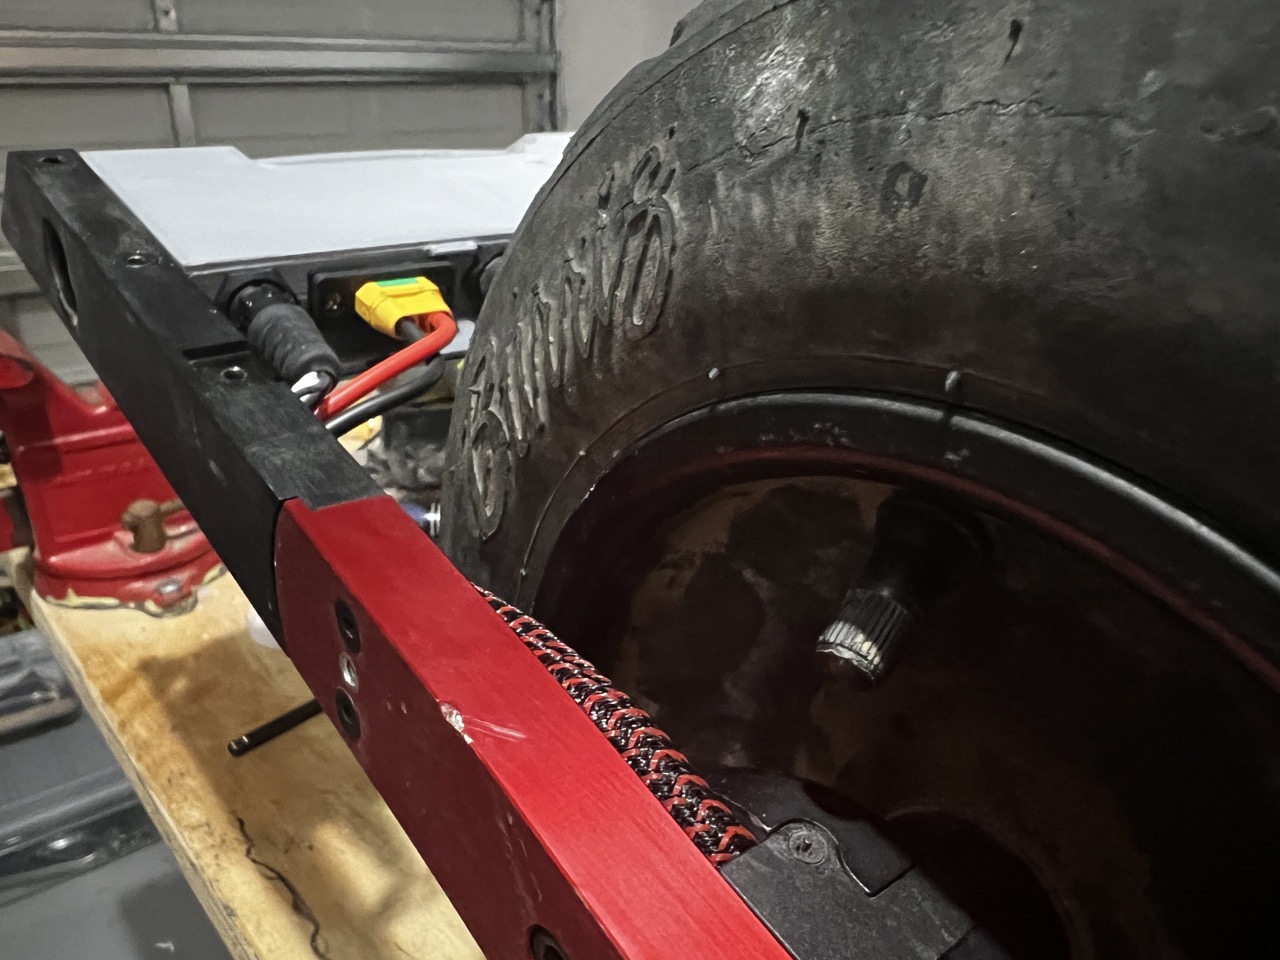
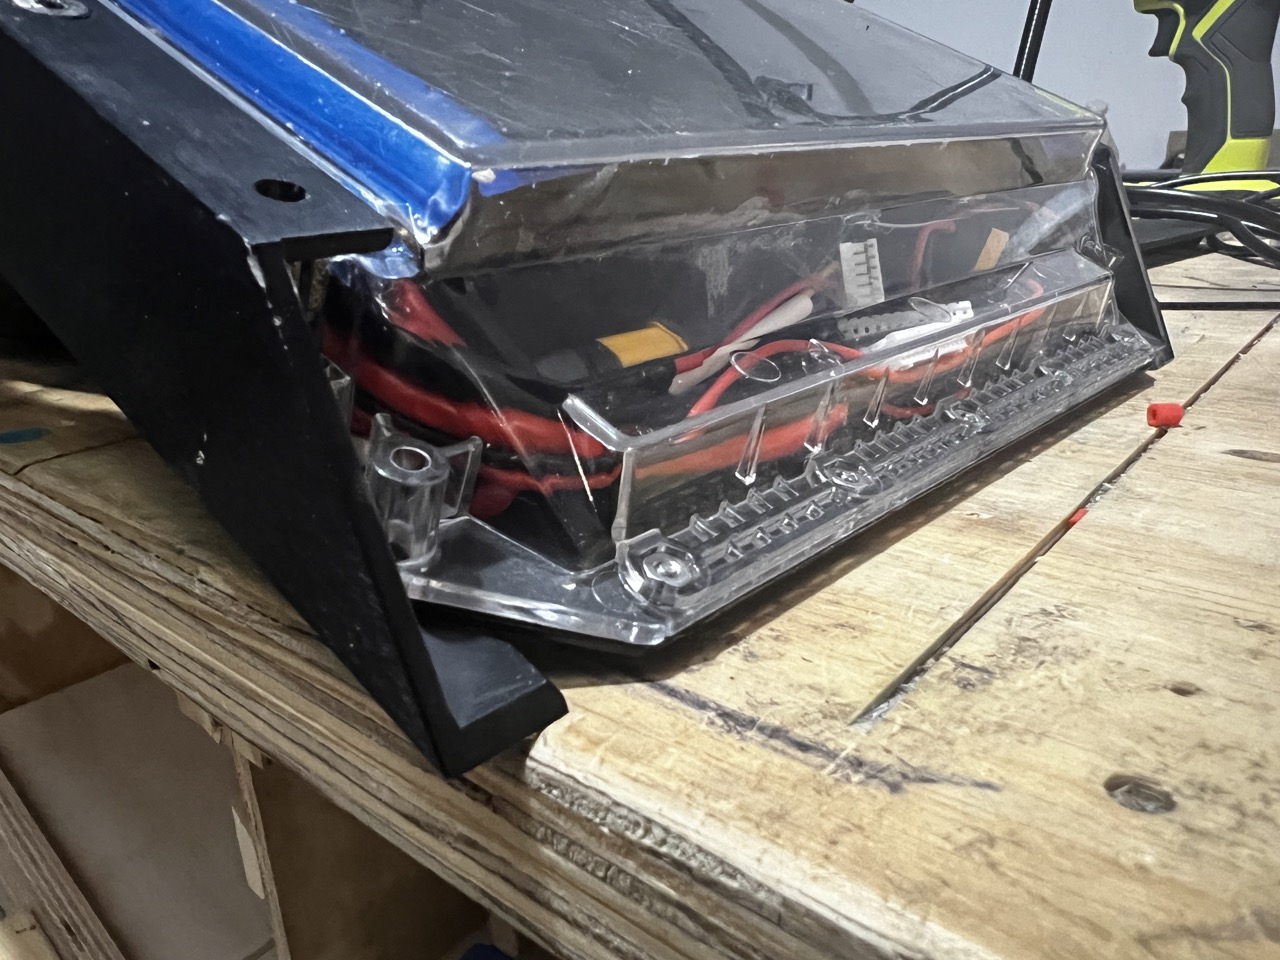
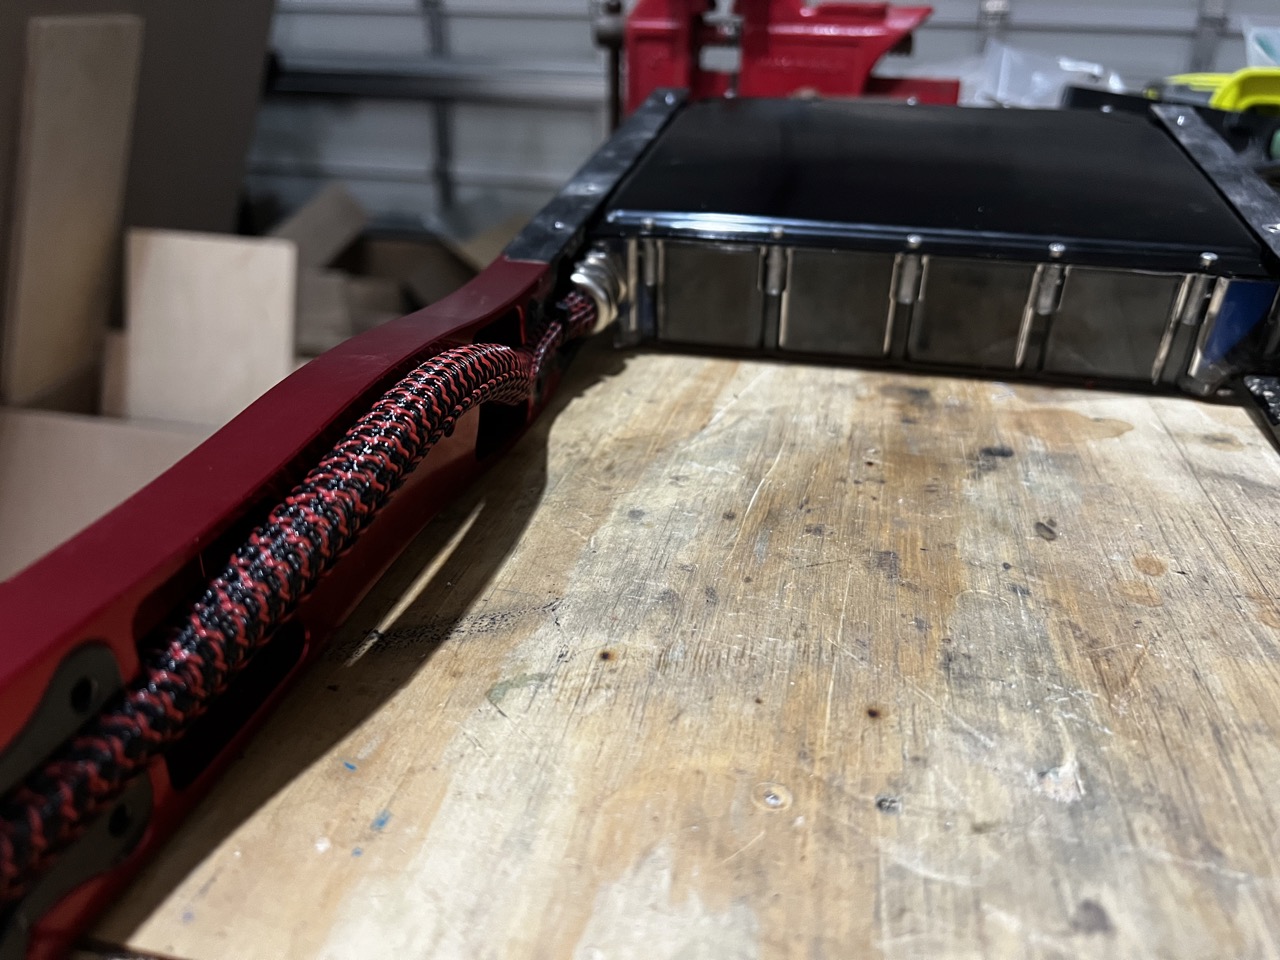
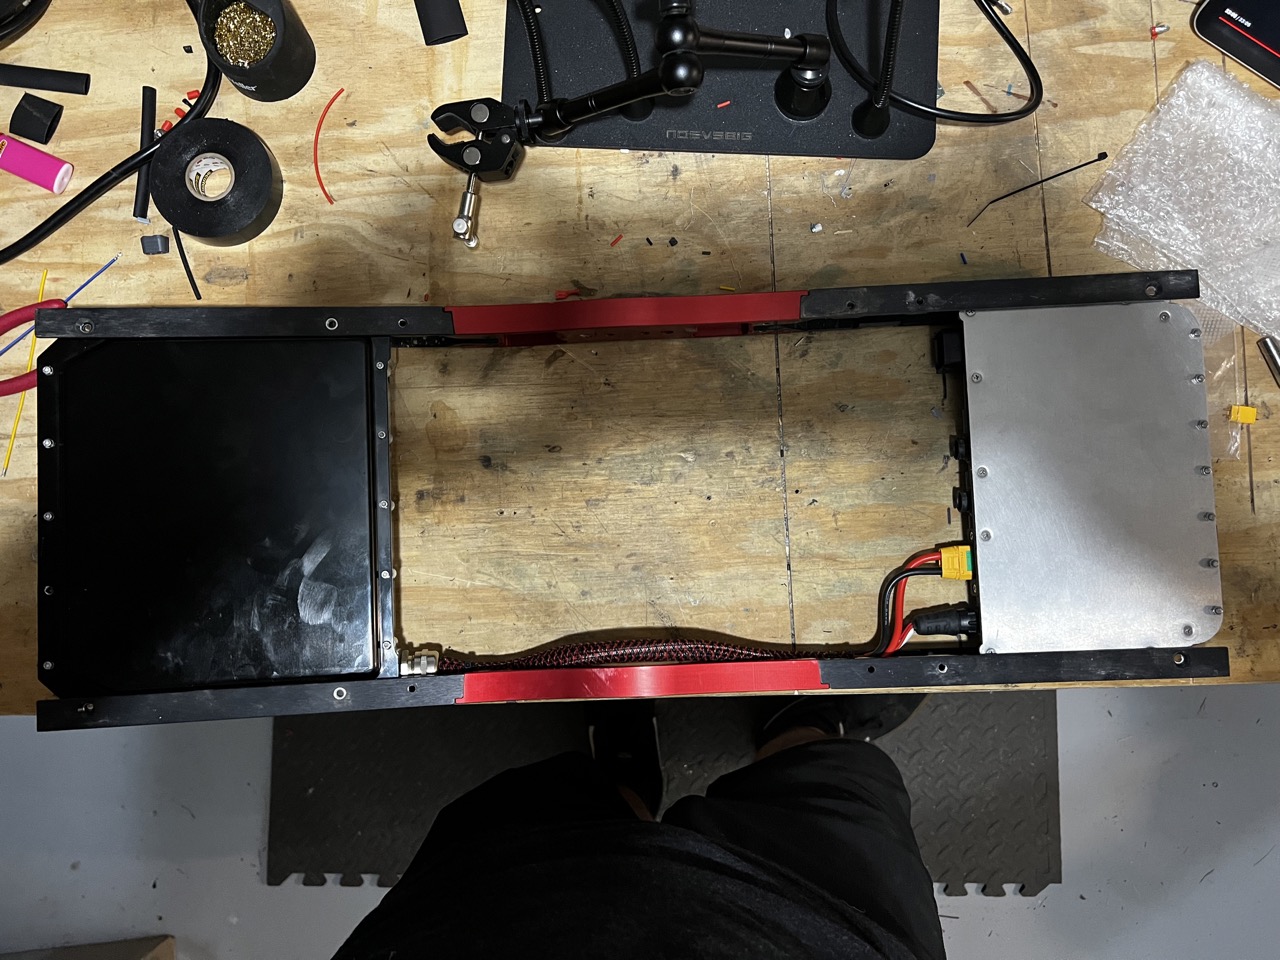
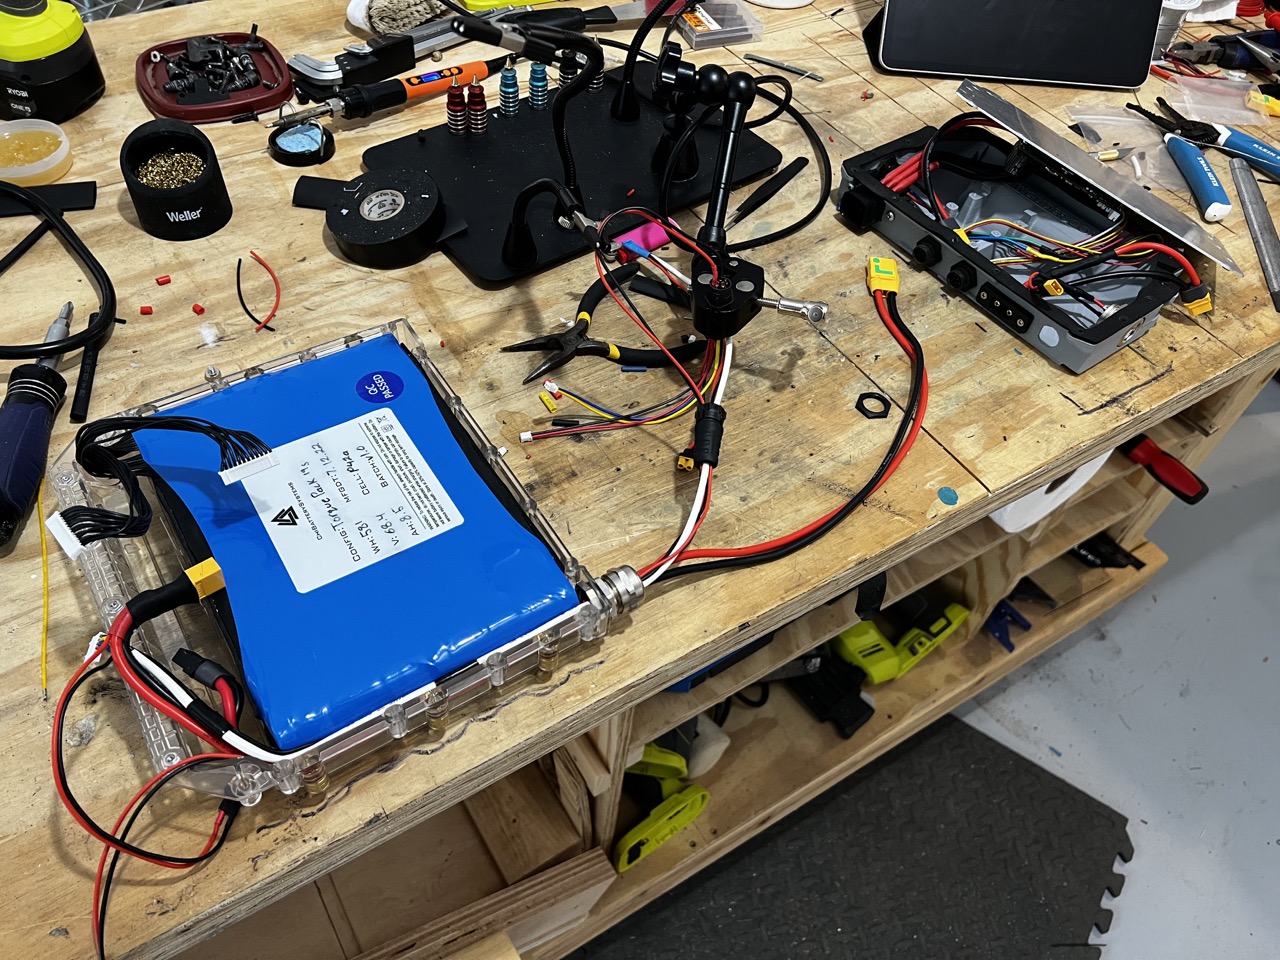
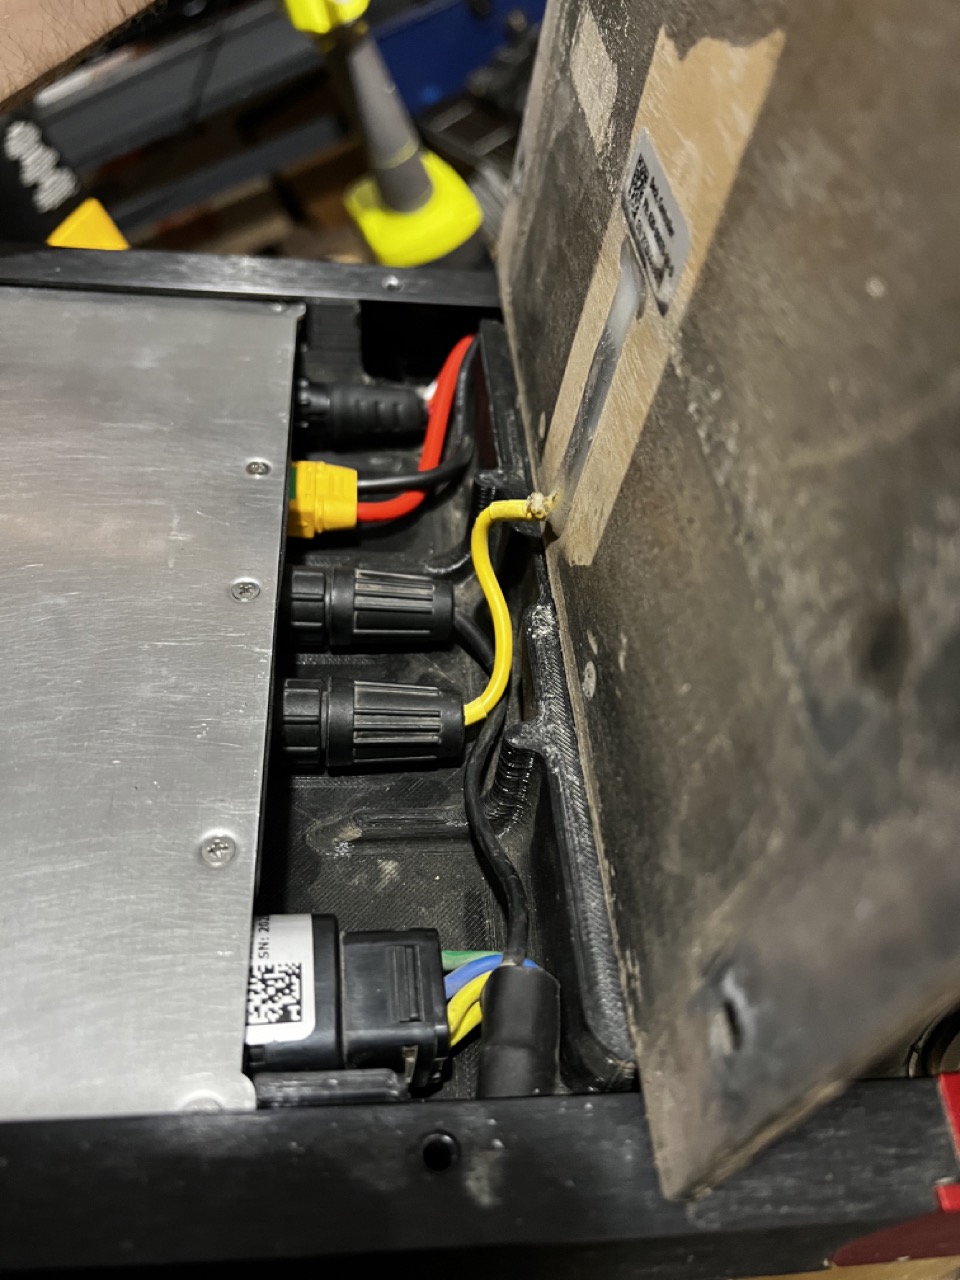
As of October 15, I’ve had my board back together and it is pretty much complete. Since then, I’ve ridden about 200 miles off-road. I modified and printed the flowglider controller box and it is working spectacularly. For a 3D printed box, ASA filament seems to be a good choice. I’m not seeing any stress cracks or layer separation - at least not yet. I’m also very happy with my choice of connectors. Nothing has worked its way loose and it’s easy to assemble/disassemble.
I want to consider this build diagram as pretty much final, but I’m still waiting on a couple of things:
- SuperFlux hub motor - I don’t anticipate any surprises but this build won’t be complete without it.
- Ennoid XLITE-24 BMS - The wiring for my BMS is working fine, but I haven’t been able to fully test it since there seems to be a problem with the device itself. I’m waiting on a replacement from the manufacturer.

TO DO
- Breakout wiring details for the footpad and hall sensors.
CHANGELOG
CHANGELOG
V3.22
- Added some build notes.
- Uploaded photos.
- Formatting.
V3.21
- Corrected typos
V3.2
-
Uploaded remixed version of the Flowglider’s WTFoc MK2 controller enclosure to Thingiverse.
-
Added wiring detail for the latching LED switch.
V3.1
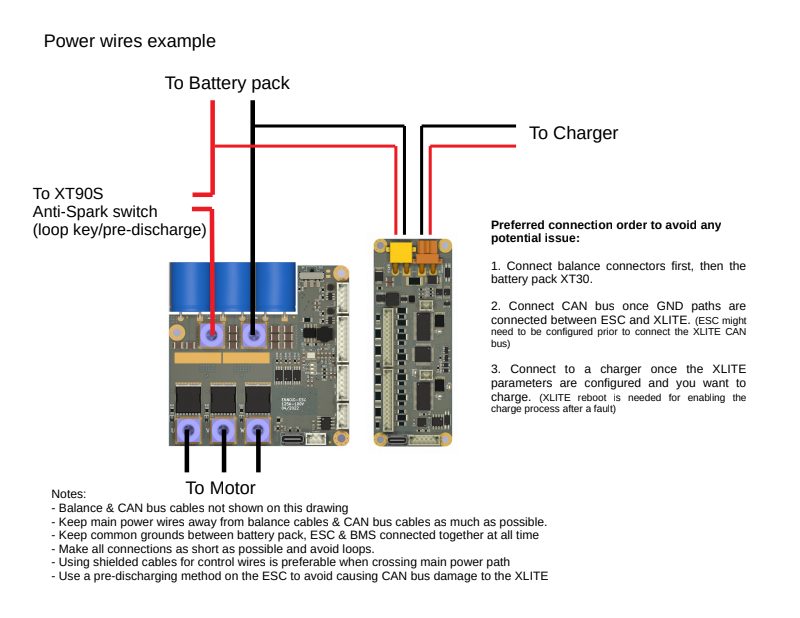
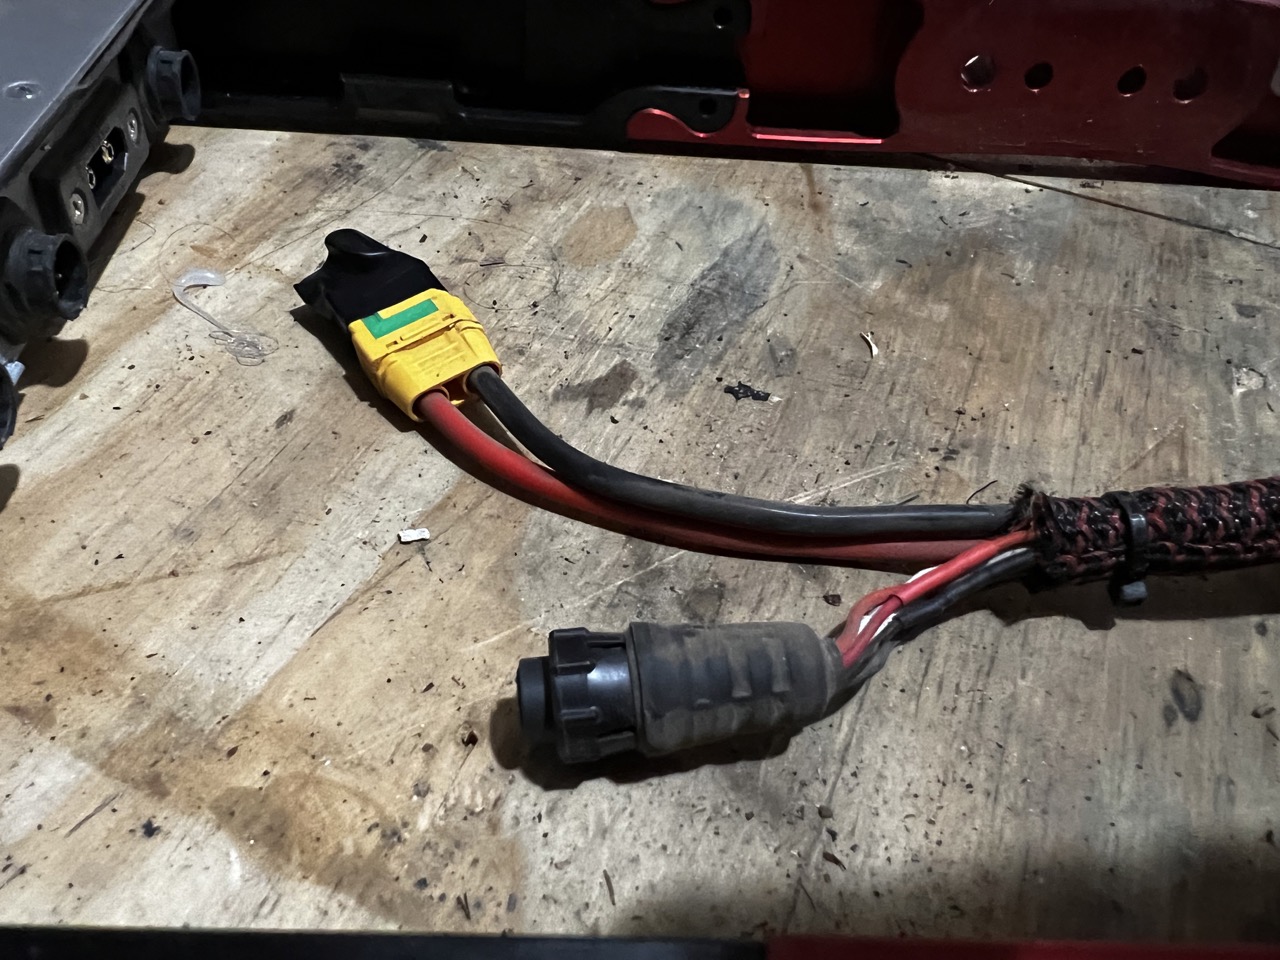
- I couldn’t make the XT90E-M fit next to a 6 pin Molex on the controller enclosure, so I decided to go with a 6 pin Switchcraft connector. Thanks to devnull for the suggestion. This is similar to the connector used for the hall sensors and the footpad. The solder cups on the 6 pin Switchcraft are made for 20AWG wire, so I’m using that for the charging circuit. 20AWG silicone wire is rated for around 12A, the Switchcraft connector is 7.5A, and the charger provides 5A, so everything should be good.
- Added wiring for the CAN bus. Using 20AWG for 5v and GND. And 22AWG shielded for CANH and CANL.
- I’ve modified the Flowglider controller enclosure in Fusion 360 for use with the Switchcraft and XT90 connectors (instead of the 16 pin Molex). It’s printing now, so once I’ve verified that the tolerances and placement are right, I’ll upload it as a remixed file on Thingiverse and Printables.
- Updated parts list with Switchcraft connectors, shielded wire, and JST connectors.
V3.01
- Corrected typo in parts listing
V3
- Reorganized the layout for general readability.
- Included a parts list with purchase links and cost.
- Removed the XT60 external mount and replaced it with a 6 pin molex. This will allow room for wiring in the Ennoid to the VESC CAN bus.
- Added a 10A fuse to the charging circuit. Which fuse(s) should we use?
- Added a 40A fuse to the discharge circuit. Which fuse(s) should we use?
- Moved from Tune Cards and Build Details to FAQs & How-tos
V2
-
I’m ditching the 16 pin molex connecter for the main wiring harness. It’s takes up too much space and it is only rated for around 30 amps. With the TorquePack and the SuperFlux, I hope to be pulling more than that. I also wanted to incorporate the anti-spark into the wiring harness, so I’m going to be using mountable XT90 and XT60 connectors.
-
I tried the FlowGlider 3D printed extended battery box, but the TorquePack won’t fit without modification. I was able to pick up a TorqueBox at FloatLife Fest, so I’m going to use that instead.
-
Updated the wiring in the battery box to accommodate for space limitations.
PARTS LIST
Purchase links are included for convenience and reference. I aquired some parts through these links, but others were on hand or included in various DIY bundles such as the one from MakersPEV.
To see all columns, hover over the table and click on “Expand Table”.
| Parts List | ||||
| Item | URL | Cost | Notes | |
| 1 | SuperFlux Hub Motor | https://fungineers.tech/products/superflux | $ 349.00 | |
| 2 | BadgerWheel TORqueBOX | https://www.badgerwheel.com/shop-online/torquebox-pre-order | $ 320.00 | |
| 3 | Flowglider 3D Printed WTFoc Mk2 - Remixed | https://www.thingiverse.com/thing:5558774 | $ 100.00 | Will post remix soon, cost is based on having part printed |
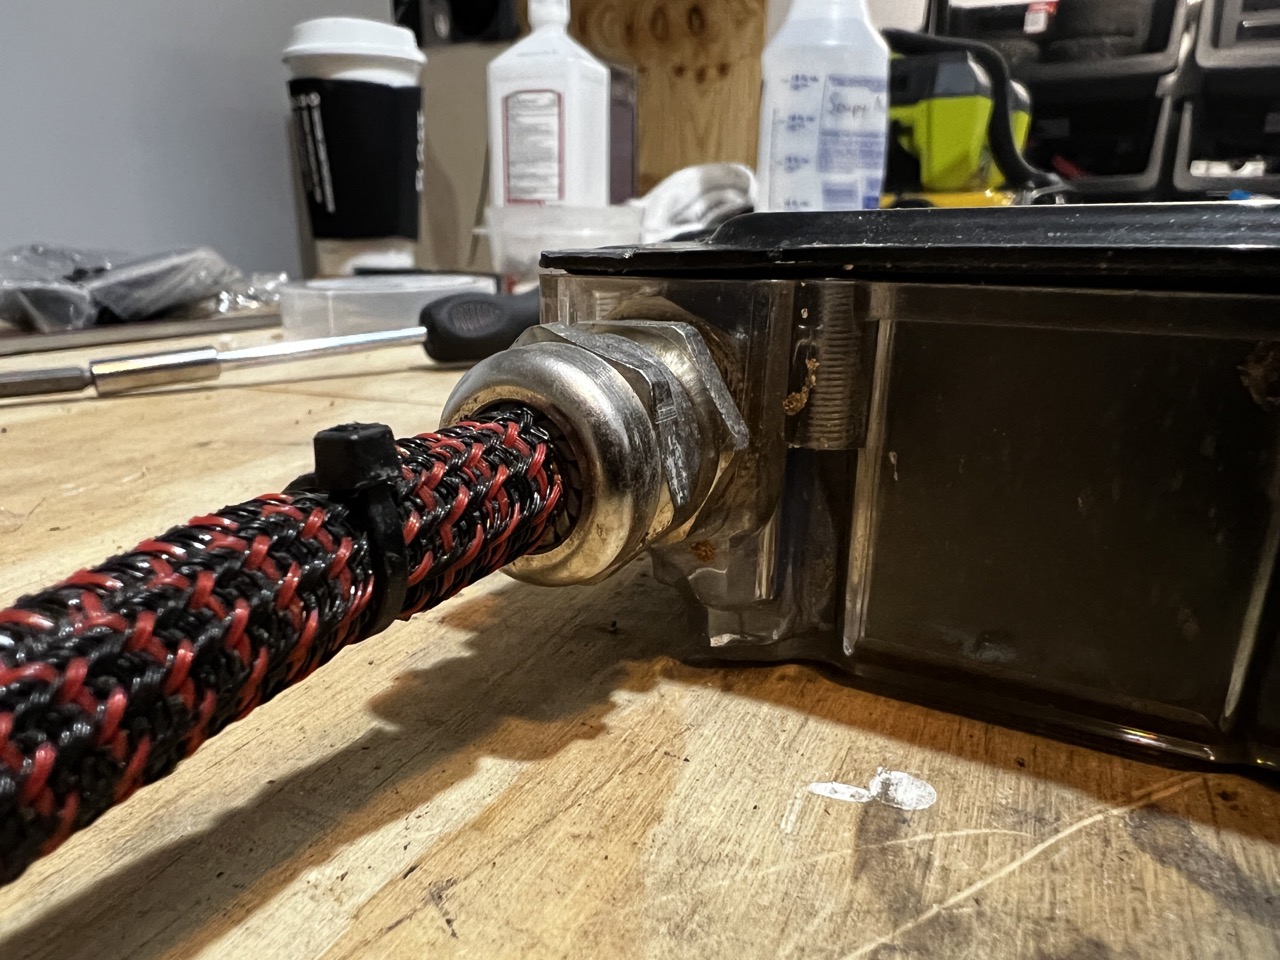
| 4 | 7-33mm M20 Cable Gland | https://www.mouser.com/ProductDetail/Altech/4220620?qs=hf6uAUcJCAXT0Ke8v%252BYw6w%3D%3D | $ 8.60 | Altech 4220620 |
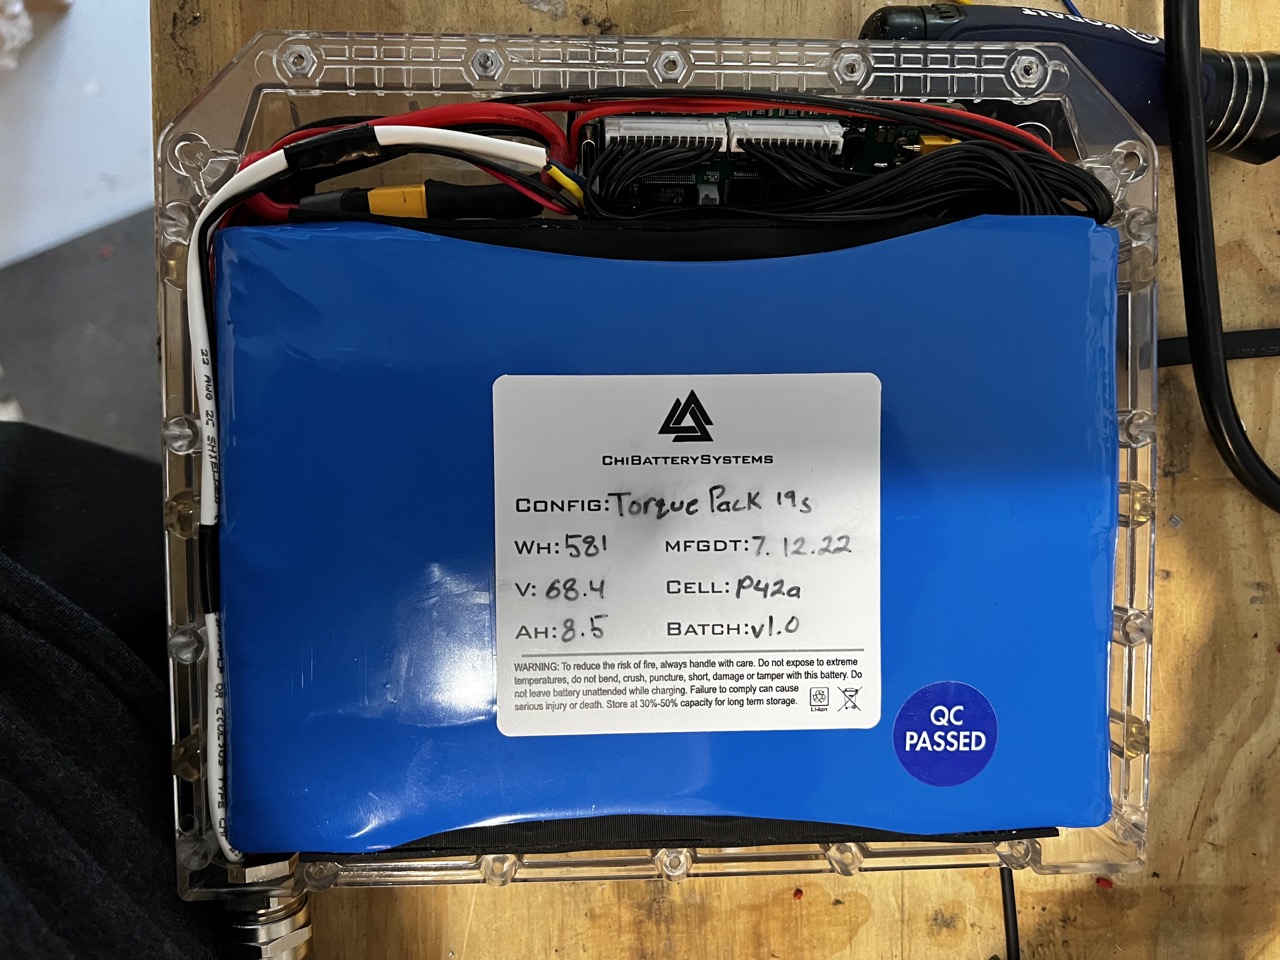
| 5 | ChiBatterySystems TORque Pack w/ Charger | https://chibatterysystems.com/collections/diyonewheel/products/torquepack | $ 714.00 | |
| 6 | Ennoid BMS XLITE-24 | https://www.ennoid.me/bms/xlite | $ 245.00 | |
| 7 | Latching Push Button Switch | https://www.makerspev.com/products/latching-led-power-switch-to-3-pin-jst | $ 20.00 | |
| 8 | Little FOCer v3 | US: https://www.makerspev.com/products/little-focer-bring-your-own-heat-sink | International: https://customwheel.shop/en/high-voltage-esc-motor-speed-controllers/little-focer-v31-esc-84v-20s | $ 300.00 | Link is for Little FOCer v3.1 |
| 9 | XLR Charge Port | https://www.mouser.com/ProductDetail/Neutrik/NC3MPR-HD?qs=1rwcFxEenw%2Fs9iRAgoWjwg%3D%3D | $ 14.55 | Neutrik NC3MPR-HD |
| 10 | Future Motion XR Sensor Footpad | https://onewheel.com/products/surestance | $ 150.00 | |
| 11 | 6 Pin Molex Motor Power Connector | https://www.makerspev.com/products/6-pin-molex-to-3-phase-4mm-bullet-connecters | $ 30.00 | |
| 12 | Footpad Connector | https://www.makerspev.com/products/6-pin-switchcraft-to-3-pin-jst-2-0mm-ph | $ 30.00 | |
| 13 | Hall Sensor Connector | https://www.makerspev.com/products/6-pin-switchcraft-to-6-min-jst2-0ph | $ 30.00 | |
| 14 | 6 Pin Switchcraft Male Panel Connector | https://www.switchcraft.com/en3-harsh-environment-panel-mount-6-contact-male/en3p6mx/ | $ 9.80 | |
| 15 | XT90E-M Mountable Male Plug | https://smile.amazon.com/dp/B0B1MDQSYF?psc=1&ref=ppx_yo2ov_dt_b_product_details | $ 14.99 | Pack of 10 |
| 16 | XT90S Female Connector | https://smile.amazon.com/gp/product/B074PTHZ3M/ref=ppx_yo_dt_b_search_asin_title?ie=UTF8&psc=1 | $ 12.99 | Pack of 5 pairs |
| 17 | XT30 Connectors | https://smile.amazon.com/gp/product/B08P5HVMYT/ref=ppx_yo_dt_b_search_asin_title?ie=UTF8&psc=1 | $ 8.58 | Pack of 10 pairs |
| 18 | XT60 Connectors | https://smile.amazon.com/gp/product/B074PN6N4K/ref=ppx_yo_dt_b_search_asin_title?ie=UTF8&psc=1 | $ 8.99 | Pack of 10 pairs |
| 19 | 12 AWG Silicone Wire | https://smile.amazon.com/gp/product/B01CJJU6NU/ref=ppx_yo_dt_b_search_asin_title?ie=UTF8&psc=1 | $ 29.98 | 25 ft |
| 20 | 20 AWG Silicone Wire | https://smile.amazon.com/gp/product/B07JJQN1JT/ref=crt_ewc_title_oth_1?ie=UTF8&psc=1&smid=AITZO53LNBA1K | $ 18.88 | 25 ft |
| 21 | Wiring Harness Sleeve | https://smile.amazon.com/gp/product/B07FW4BN1P/ref=ppx_yo_dt_b_search_asin_title?ie=UTF8&psc=1 | $ 9.99 | 10 ft |
| 22 | 10 A Fuse | https://www.digikey.com/en/products/detail/schurter-inc/0001-2514-PT/639833 | $ 0.86 | |
| 23 | 40 A Fuse | https://www.digikey.com/en/products/detail/schurter-inc/SUT-H-6332-40A00-PGT-TT-NI/9760593 | $ 1.93 | |
| 24 | 6 Pin Switchcraft Female Cable End | https://www.switchcraft.com/en3-harsh-environment-cable-mount-6-contact-female/en3c6fx/ | $ 14.79 | |
| 25 | JST Connector Kit | https://smile.amazon.com/gp/product/B096QG96J4/ref=ppx_yo_dt_b_search_asin_title?ie=UTF8&psc=1 | $ 23.99 | |
| 26 | Shielded 22 AWG Wire for CAN bus | https://smile.amazon.com/gp/product/B071DFHKRB/ref=crt_ewc_title_srh_2?ie=UTF8&smid=A3CTP98AJZAENL&th=1 | $ 31.10 | 100 ft |
| 27 | 6 Pin Molex Female Connector | https://www.mouser.com/ProductDetail/Molex/19418-0021?qs=VELuYEe1V6FyC%2FZtBNhIBg%3D%3D | $ 6.16 | |
| Not Pictured | ||||
| Lid Kit for 3D Printed Flowglider Controller Enclosure | https://www.littimber.com/product/wtfoc-mk2-lid/ | $ 45.00 | ||
| BadgerWheel Bumper for TORqueBOX | https://www.badgerwheel.com/shop-online/torque-bumper | $ 70.00 | ||
| The Float Life FAF Varial Rails | https://thefloatlife.com/products/varials?_pos=2&_sid=f97e85e30&_ss=r | $ 350.00 | ||
| The Float Life Enduro Tire | https://thefloatlife.com/products/tfl-enduro-tire-preorder | $ 109.00 | ||
| The Float Life Fender Deletes | https://thefloatlife.com/products/float-fender-delete?_pos=1&_sid=7cb218bc4&_ss=r&variant=34869515485352 | $ 20.00 | ||
| The Float Life LifeSavers | https://thefloatlife.com/products/life-savers?_pos=2&_sid=913efbb74&_ss=r | $ 29.00 | ||
| The Float Life Kush Wide | https://thefloatlife.com/products/kush-wide?_pos=1&_sid=d5026de9d&_ss=r | $ 105.00 | ||
| WTFoc MK2 Connector Cover | https://www.littimber.com/product/wtfoc-mk2-connector-cover/ | $ 20.00 | ||
| Electric Bigfoot XR HoverPad Grip | https://www.electricbigfoot.com/shop/dual-density-hover-pad | $ 69.95 | ||
| Total Cost | $ 3,322.13 | |||
To see all columns, hover over the table and click on “Expand Table”.