This guide will help you install a Fungineers motor cable in your Hypercore motor. This method replaces the entire cable, leaving you with a reliable and professional-looking conversion that will last for years. No splicing, no cable bulge, and extra length tucked inside the axle for future length adjustments.
Modifying the internals of a motor can be daunting! Please familiarize yourself with the full process before starting. Nothing worse than getting 3/4 finished and realizing you forgot to order sealant or replacement bearing o rings!
Tools:
- allen keys
- soldering iron
- solder sucker or solder wick
- side cutters
- wire strippers
- flat head screwdriver (to poke the black sealant out of the axle)
- tweezers (to untie and tie the string)
- heat gun
Materials:
- Hypercore
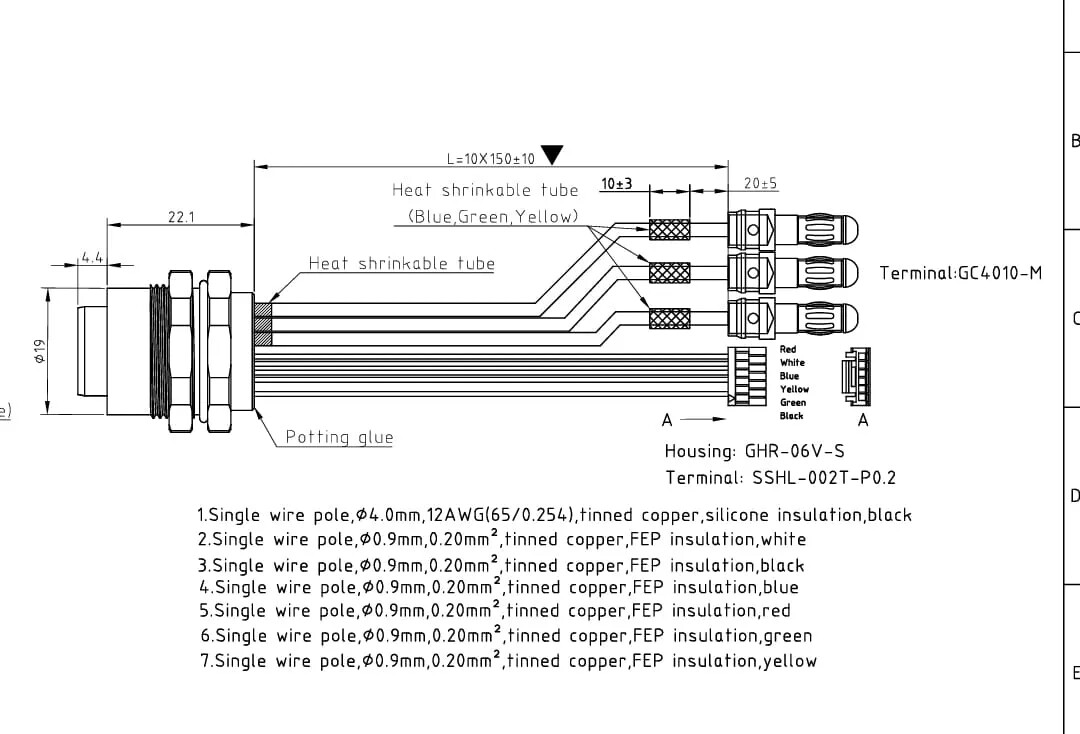
- Fungineers motor connector (motor side)
- solder
- heat shrink
- flowable silicone (or another heat resistant sealant)
- replacement bearing o rings (XR or GT/Pint)
Steps:
-
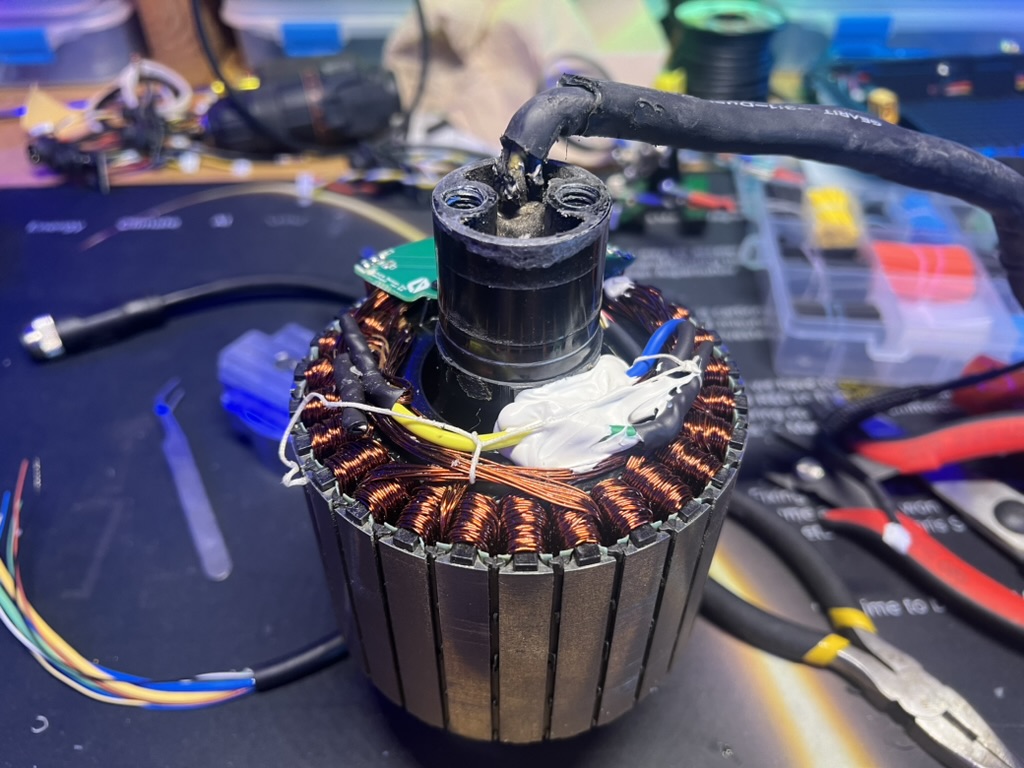
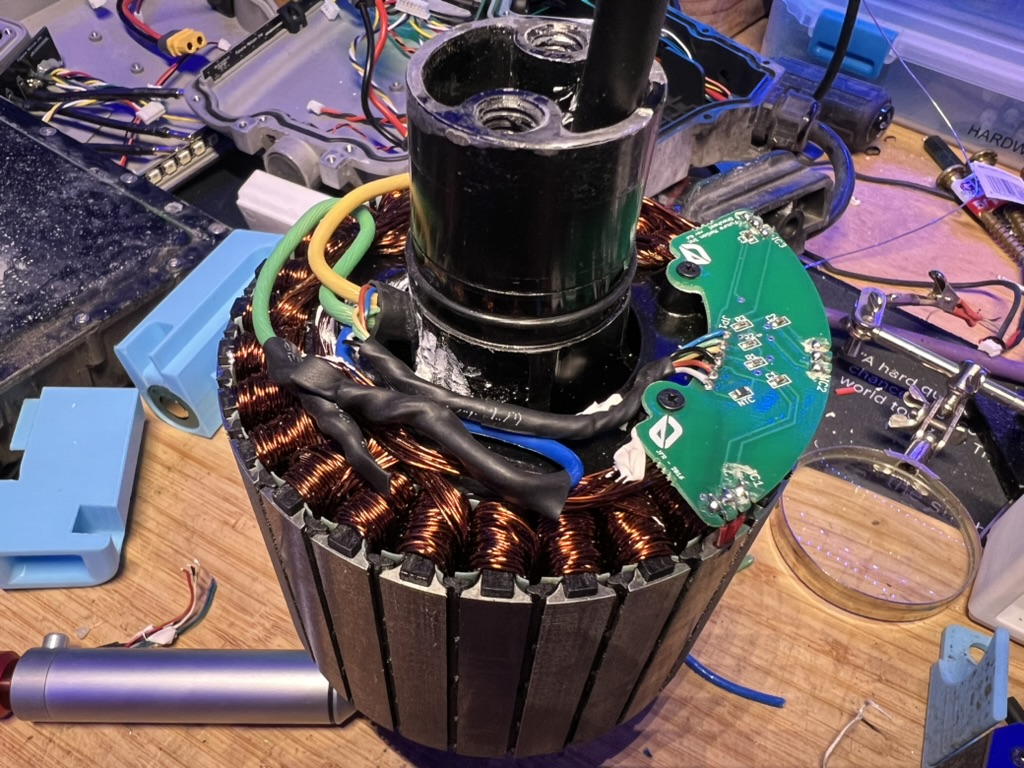
take the stator out of the hub:
- remove the 7 bolts from the cover plate
- bolt a rail onto the axle on the plate side and use it to lift the stator out of the hub
- remove the rail and axle block, then pull the cover plate off
-
disconnect the old motor cable wires:
- untie the string holding down the wires and save it for later
- take the heat shrink off of the phase wires
- desolder and disconnect the phase wires from the windings
- note: if you accidentally cut one of the motor windings, you’ll need to scrape off the nonconductive coating before resoldering the wire back together
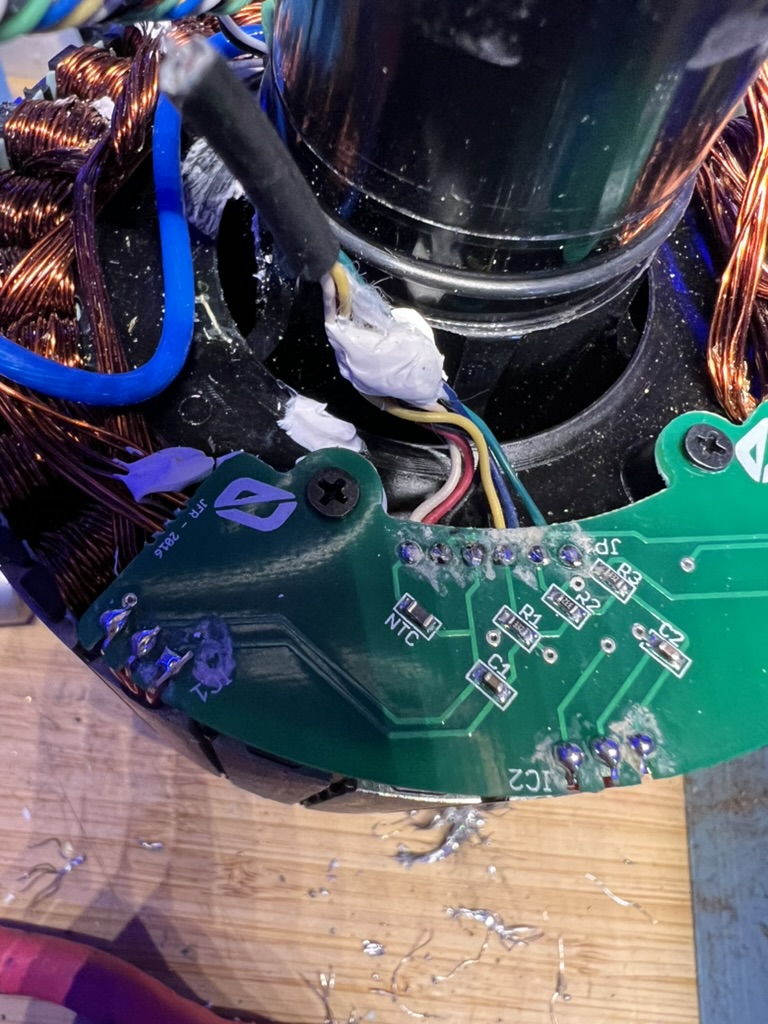
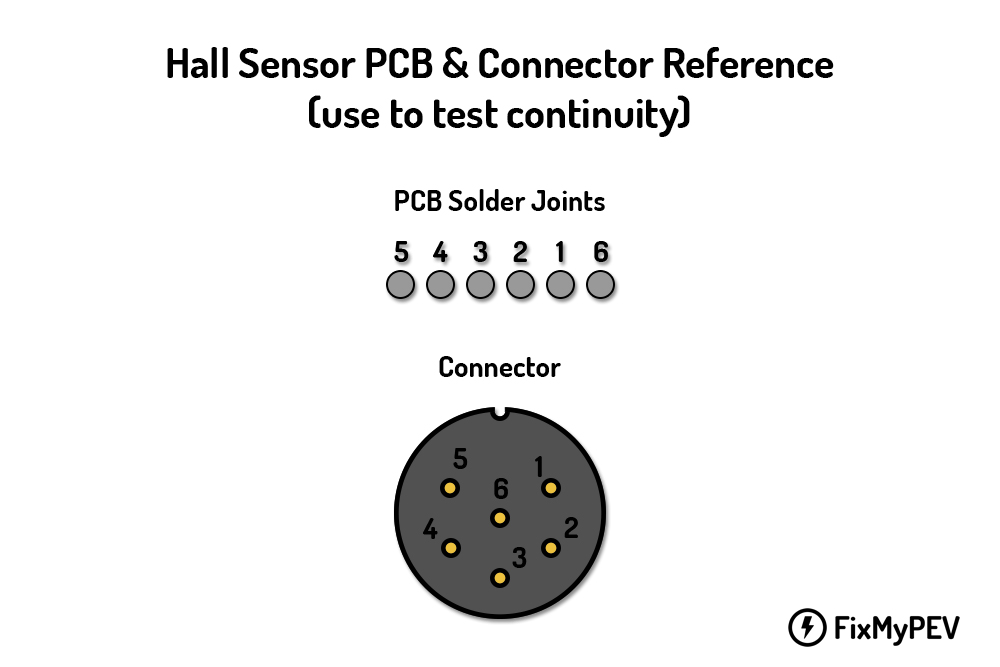
- take a picture of the hall sensor PCB to remember the order of the wires!
- unsolder the small wires (temp + hall sensors)
-
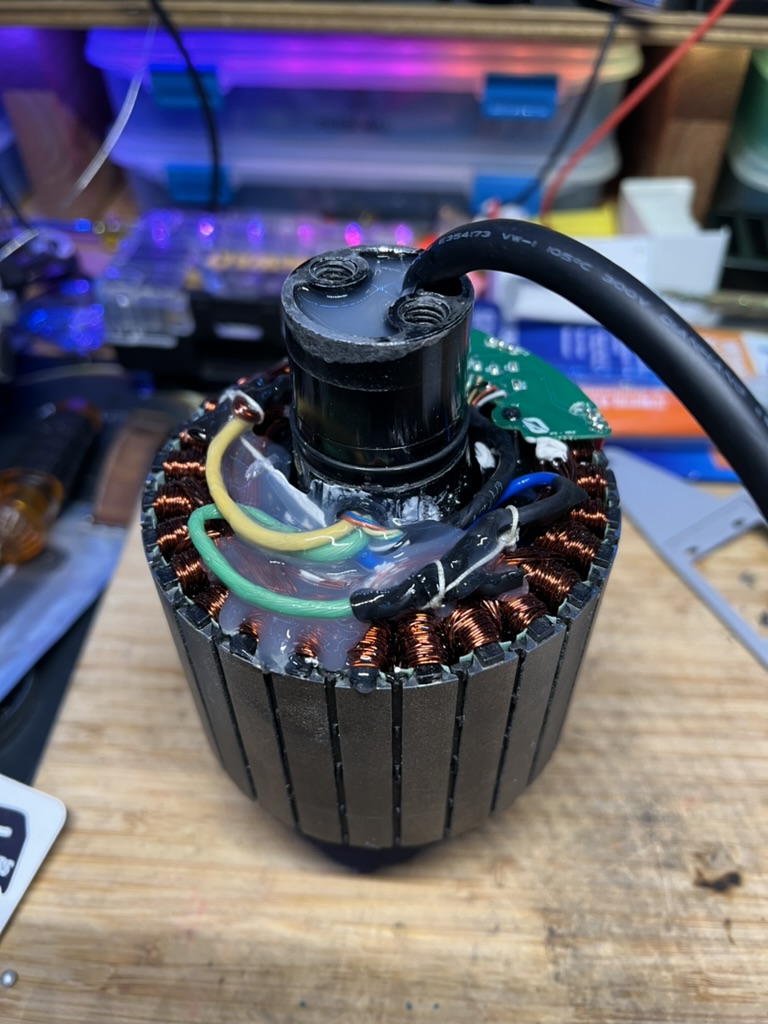
remove the old cable:
- carefully pick away as much of the white sealant from around the phase wires as you can
- pick away as much of the black sealant from inside the axle as you can
- remove the rubber seal from the motor cable side of the axle
- pull the old motor cable out of the axle
-
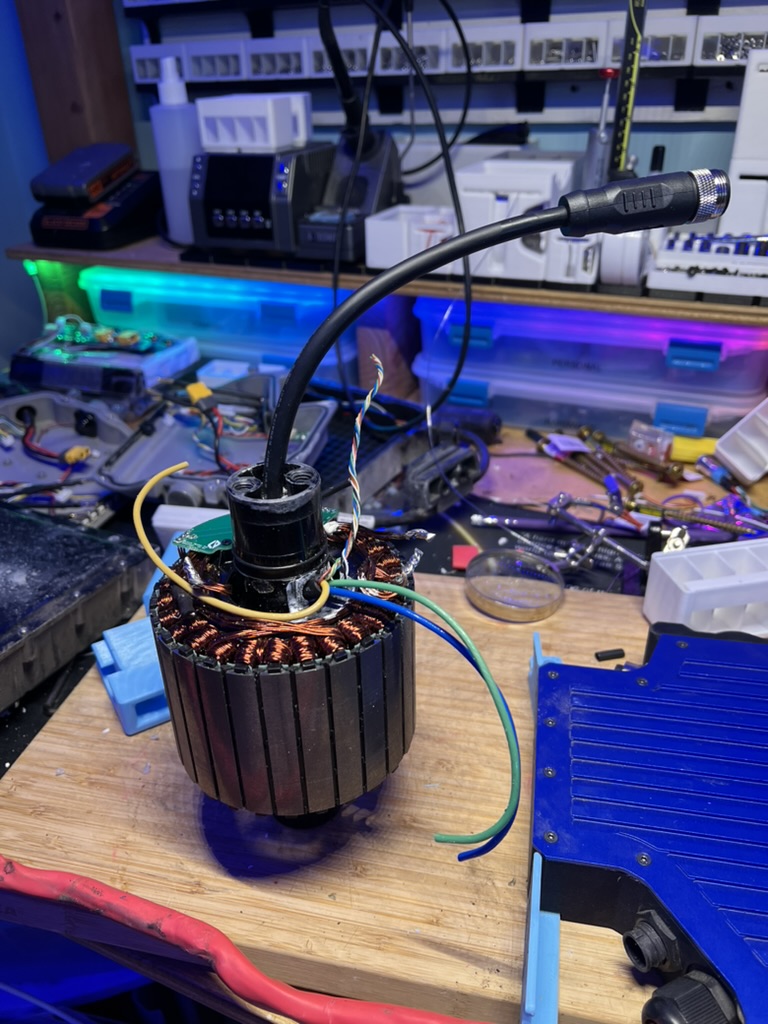
insert the new cable:
- feed the new motor cable through the rubber axle seal
- feed the cable into the axle and through the cable hole
- fold the excess cable in half and shove it into the axle so you can adjust the cable length later
-
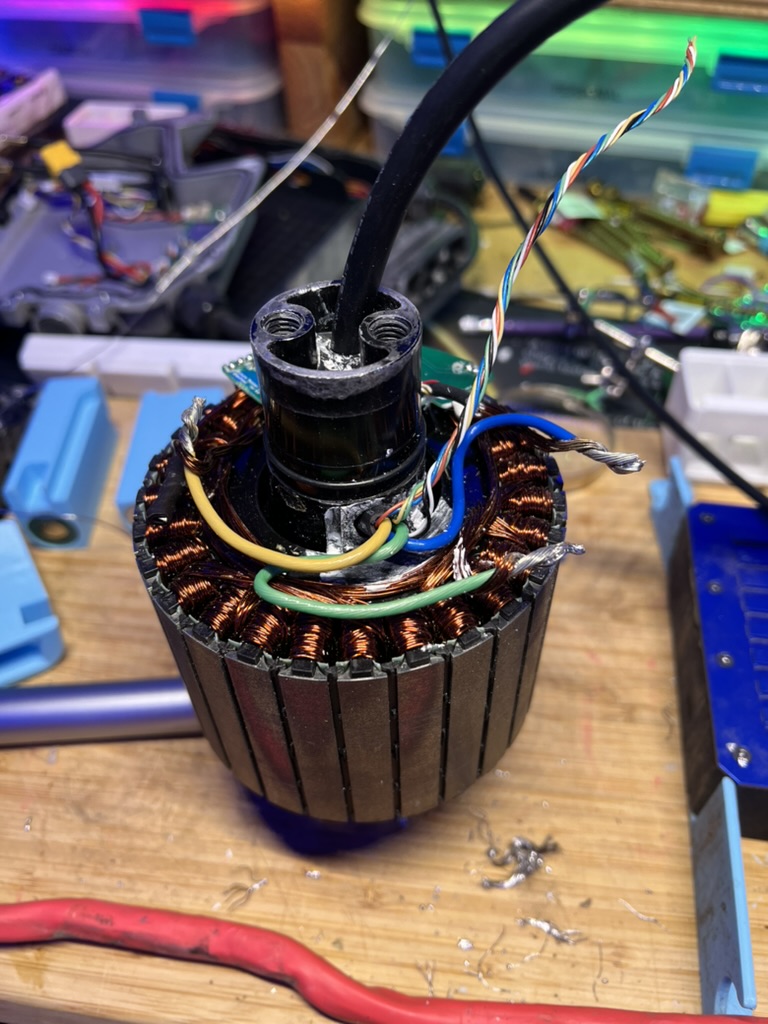
connect the new phase wires:
- cut the phase wires to length and strip them
- solder the phase wires to the motor coils
- cover solder joints with heat shrink
-
connect the hall and temp sensor wires:
- twist the small gauge wires together and cover the bundle with heat shrink
- cut the wires to length and solder them to the PCB in the same color order as before: [ temp ]-[ 5v ]-[ ground ]-[ hall 1 ]-[ hall 2 ]-[ hall 3 ]
-
secure and seal the new cable:
- tie the string back in place to keep the wires away from the rotating cover plate
- use flowable silicone or another heat resistant sealant to waterproof and further hold the wires in place
- [optional for further waterproofing] adjust the length of the motor cable in the axle, then fill both side of the axle with silicone to fully seal the axle
- let the sealant cure overnight
-
reassemble the motor:
- install new o rings on the axle
- slide the cover plate over the new motor connector and press into place
- spin the cover plate to ensure the wires aren’t rubbing
- attach a rail to the plate side of the stator and lower the stator into the hub
- align the bolt holes in the cover, then press the stator firmly down into the hub
- reinstall the cover plate bolts, tightening in a star pattern to apply even pressure around the plate
- reinstall motor into your board and re-run motor wizard