UPDATE: I now offer this as an upgrade service at NRD if you wish to have someone else (me) do this for you!
Have an ADV1 or a floatwheel kit (ADV200) and want to add a VESC Express to use a Pubmote with it? You’re in the right place! Lets get started.
FIRST, you must confirm that your kit is CAN compatible. The current research consensus is that all purple drop in kits are already CAN ready and white kits are NOT CAN ready, but it is always good to check.
To confirm this, remove your LCM and look above the LCM post that is next to the 6 pin hall sensor connector.
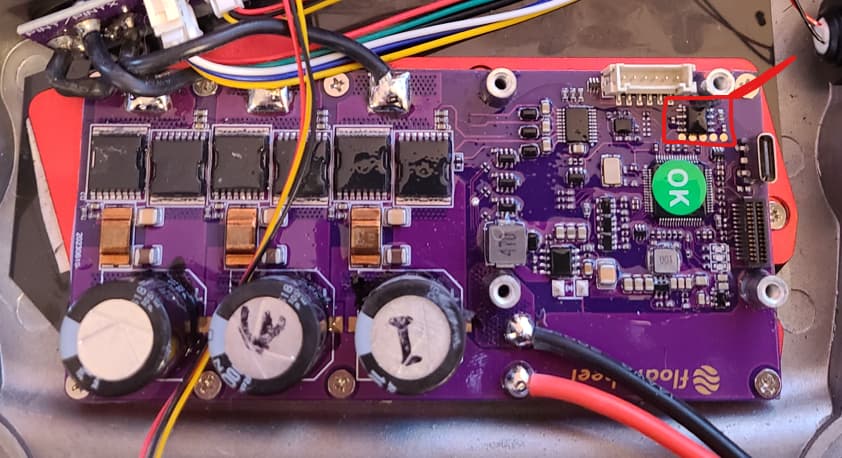
This is what we are looking for, a small black chip with 8 legs and 3 resistors around it. If you have this you’re set!
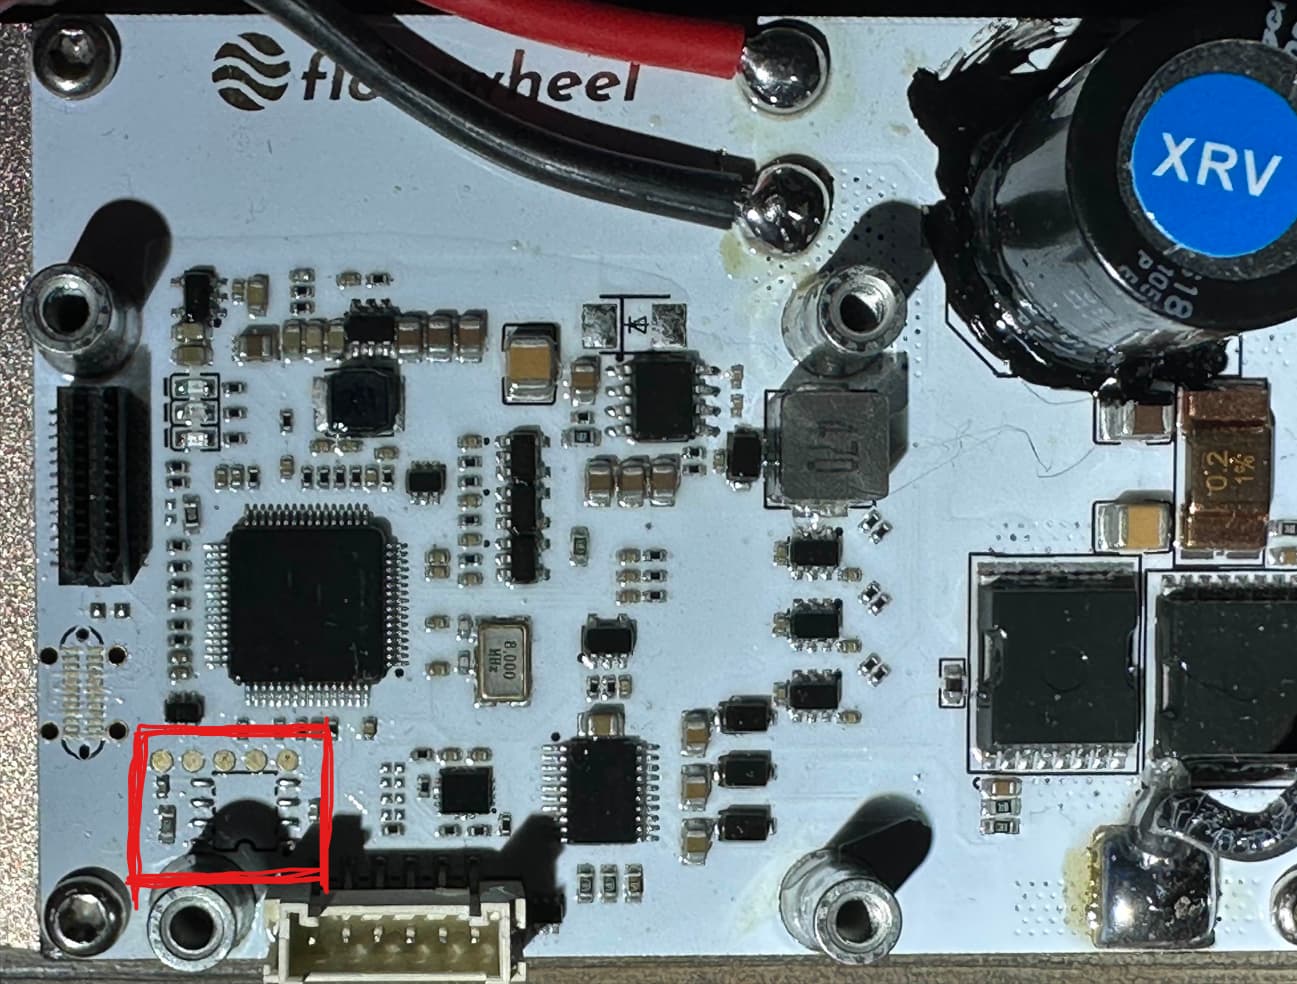
This is an example of a white drop in kit without a CAN IC. If you don’t have a CAN IC, it is possible to add one. The IC is a TJA1040 and it will need to be soldered on with the NXP text closest to the adjacent LCM post. Alibaba and Aliexpress are your friend for finding this. After this mod you are set.
Now, we can pick out a VESC Express. This is one built by avaspark that can work and I also build modules myself with a TJA1050 and a Seeed Studio ESP32C3 in a 3D printed case. If you want one send me a message or follow this esk8 post to make one. Another easy option is this module on Aliexpress. It is common for these to ship with 6.02, however updating these is as easy as updating the firmware on your controller.
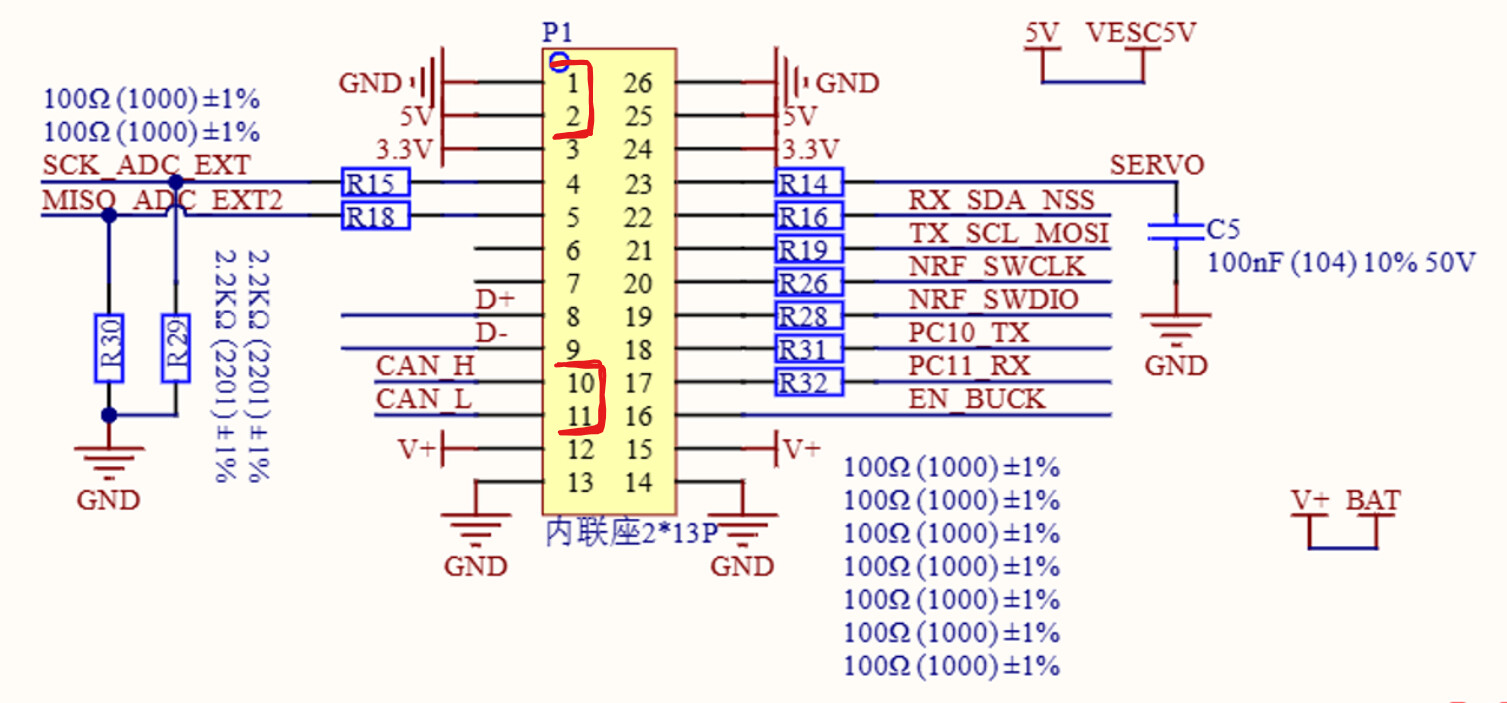

Now this is the hard part. 4 wires need to be soldered on the main connector on the underside of the LCM, specifically pins 1, 2, 10, and 11 for ground, 5v, CAN H and CAN L. This requires a fine tip, a tiny bit of flux and solder and steady hands with finesse. I used dupont/jumper cables just in case I needed to swap my module for any reason.
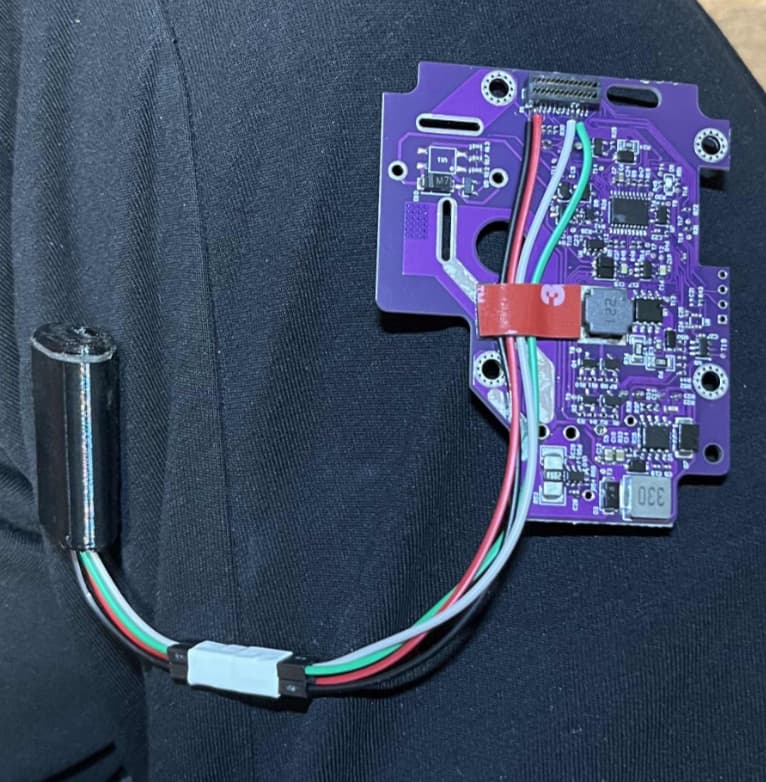
This will be similar to your final product! I highly advise checking to make sure the wires are not shorted in any fashion and then adding some silicone over them for strain relief. Bonus points if you use a piece of 3M for max strain relief.
Proceed to this post to get started with Pubmotes!